Happy Monday to you! I have recovered after my crafting escapades at the weekend. See here for a refresher! I am so excited, I am off to New York in a couple of weeks and I am looking forward to picking up some crafty items, some of which will go towards my giveaway on my 100th post which should be on Monday the 4th of April, and I am excited about that too!
Sorry, I digress. Here is the challenge for this week!
Vintage, Layers and Decorative Pins.
I would have normally gone at this in my usual way, using pastel colours and lots of flowers and lace etc, but this time I decided to attempt a more grungy vintage style which is not really in my comfort zone, but I really like how it turned out!
I went with the vintage style, used lots of layers and a decorative pin.
Supplies used: Crate Paper Restoration papers, K&Co Die Cuts, TH Ticket, Brushed Corduroy Distress Ink, Prima Flowers, Vintage Looking Lace, Crystal Topped Pin, Vintage Button, MS and Fiskars punches, Vintage book page.
Looking forward to seeing your creations. Have a great week!
95/100
Showing posts with label vintage. Show all posts
Monday, 7 March 2011
Monday, 17 May 2010
Old Time Anniversary
I am amassing quite a stash of cards in my little card box but I noticed that I have plenty of birthdays and simple sentiments but none that really cover anniversaries. I set right to work making a card and it all started with the rose. If you haven't seen Wendy Vecchi's tutorial, hop on over to have a look, you'll be glad you did, and as she says they are addictive!
I took the basic 5 petal rose and added in a number of individual petals to make a more ruffly rose, instead of using grungepaper as suggested I used MME Wild Asparagus paper. The best tip I can give when using paper, as it is less forgiving than grunge paper, it to cut your petals, then take each individual petal and to screw it up into a ball, flatten it back out and to gently curl it using either your thumbnail or a bone folder, it allows you to curl the petals without hardly any rips and tears. I then inked the edges using cat's eye chalk ink.
It sat on my desk and I played with it for a good couple of days turning it this way and that before commiting myself to putting it on a card, they are just so pretty! I added a mat of MME paper, stamped a postcard on some cream card using a Prima stamp, distressed it with distress ink to add some age and rounded the corners, I popped the postcard and a tag behind a die cut piece of K&Co paper (I love that paper, I have one and a half sheets left and keep telling myself to just use it up and not hoard it!) I then stamped a clock image using a Hero Arts stamp which I found in the land of bargains known as Home Sense! and dusted it with perfect pearls for a more subtle look.
I sewed some ruffles using MME paper, added it to the card and layered it with some Prima lace and added some gems, buttons, ribbon and a stick pin dyed to match using alcohol inks. The sentiment is from one of my favourite Hero Arts sentiments sets.
The card is quite bulky so needs to be sent in a boxvelope. I love how it turned out, it came out quite vintage-y which is what I was going for, I think I am going to send this to my husband's grandparents for their anniversary this year, they have been together for 63 years and are still very much in love, I only hope that my husband and I are as happy as they are when we have been married for that long!
Happy crafting, looking forward to WOYWDW, hope you consider joining in too!
Tuesday, 1 September 2009
A very productive few days.
I was lucky enough to finish work on Wednesday afternoon for a few glorious days off and decided that I should really get started on making some cards. I have so many birthdays and anniversaries coming up in the next couple of months, usually I only have 1-2 occasions to make for but I have 17 over the next 3 months and I need to make a headstart!
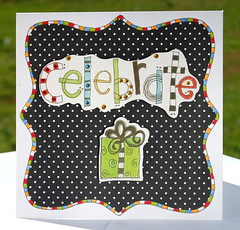
However, sometimes things don't always go to plan. Here is the first, created for my boss for his birthday on Sunday, although I have now found out that he does not celebrate his birthday and is particularly touchy as he is 40 this year so I guess this one is going back in the box ready for another male birthday - I always have trouble striking the right balance on men's cards. I created a template for the background, cut it out of Doodlebug dotted swiss and doodled the coloured frame on the outside to tie it in with the pre-made greeting.
This one below isn't floating my boat, sure it would be lovely to blog about the things you are most proud of, but hey, i'll take the rough with the smooth!
Regardless of the fact that I just spent £30.00 on some new Hero Arts greeting stamps I couldn't find the right sentiment for the card so I used a K&Co sticker, but it had yellow/green on it and there was none on the card so I added the Doodlebug frill. I don't know what it is about me but I like things to tie together, I definitely need to try something outside of my comfort zone!
However, sometimes things don't always go to plan. Here is the first, created for my boss for his birthday on Sunday, although I have now found out that he does not celebrate his birthday and is particularly touchy as he is 40 this year so I guess this one is going back in the box ready for another male birthday - I always have trouble striking the right balance on men's cards. I created a template for the background, cut it out of Doodlebug dotted swiss and doodled the coloured frame on the outside to tie it in with the pre-made greeting.
I then became distracted from the task at hand and made a couple of others, not for any particular purpose but just to pull a couple of ideas together.
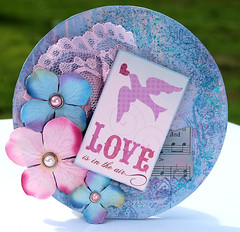
I have been playing around with some vintage-y ideas for a while but I can't seem to strike the right balance, this seems a little bright and the distress stickles didn't go quite how I wanted but when I catch a glance at it on my desk it looks so pretty and girly that I can't resist it! IRL the love card sits behind the flower petals.
This one below isn't floating my boat, sure it would be lovely to blog about the things you are most proud of, but hey, i'll take the rough with the smooth!
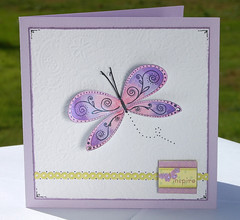
I started off cruising around some blogs looking at stamping techniques so thought I would have a go at stamping and watercolouring. I am resisting the temptation of Copics/Promarkers and I know I couldn't just start off with one of two, I'd want the whole set! I stamped the butterfly with staz-on, so far so good, pencilled with the watercolours and blended them together and I thought it looked ok, then I smothered the whole thing in perfect pearls which looks very spangly but doesn't really show in the picture.
Regardless of the fact that I just spent £30.00 on some new Hero Arts greeting stamps I couldn't find the right sentiment for the card so I used a K&Co sticker, but it had yellow/green on it and there was none on the card so I added the Doodlebug frill. I don't know what it is about me but I like things to tie together, I definitely need to try something outside of my comfort zone!
It's definitely on the 'meh' list so I think i'll just save it for when I need to dash off a quick card! More cards to post this week :)
Subscribe to:
Posts (Atom)