Hello! It’s been awhile, seven months to be precise and during that time I felt like I lost myself craft wise, none of my ideas seemed original and I had over-saturated my brain by looking at blogs and pinterest on a daily basis. It started at the beginning of last year, I was less and less inclined to go in my craft ‘studio’ and create and by March I had had enough. Enough of what I wasn't completely sure of.
I purchased a number of stamps, dies and pads in June most of which were left untouched on my desk until recently. Every time I would go in my room those purchases would taunt me. ‘Come play with us, it will be fun’ but I would always start to feel panicky and would have to leave the room, sounds silly right?
I think the fear that prevented me from entering my room was due to having ‘crafter’s block’ and then looking at the sheer amount of money I have poured into this craft and it was sitting there, unused and it is money I can’t ever get back. For those reasons and many more I keep coming back to the idea that I should quit. My husband kept reminding me of the joy it once gave me, and I had no idea how to get it back, I’m getting there slowly but it hasn't been a quick process.
It’s disheartening to go to chain card shops in my town and find them churning out beautiful looking cards with handmade touches for a tiny price. When you factor in supplies and my time the cards that I make work out more expensive but I don’t feel that I can charge a higher price. I am then stuck with the thought that I don’t actually make cards with the intent to sell them so it shouldn't matter.
Towards the end of December I made my first card....and I hated it. It’s nice enough but I got the positioning all wrong, the white space is imbalanced and I am not the type of crafter that can throw a project that’s not working in the bin, take a look for yourself.
Cardstock – Bazzill Card Shoppe. Patterned paper – Peppermint, Crate Paper.
Dies – Lawn Fawn, Wplus9, Avery Elle, My Favourite Things. Stamps – Wplus9.
Glitter paper – American Crafts. Enamel Dots – handmade.
I felt discouraged but persevered and a week later made the following card.
Cardstock – Bazzill Cardshoppe. Patterned paper – Crate Paper. Dies – Wplus9,
Lawn Fawn. Stamps – Wplus9. Chalkboard sticker – American Crafts.
I was not happy with this one either, it’s a bit wishy washy and I’m not sure going with black for the banner was the right decision, in fact, I just plain don’t like it.
At this point I really did feel like I should give up; however I saw
this card a couple of weeks later by my friend Nat at
Kool Kitty Musings and was inspired to create something similar
Cardstock - Bazzill Cardshoppe. Patterned paper - Cambridge Court, Kate & Co - My
Mind's Eye. Dies - Lawn Fawn. Pins - Dainty Paperie.
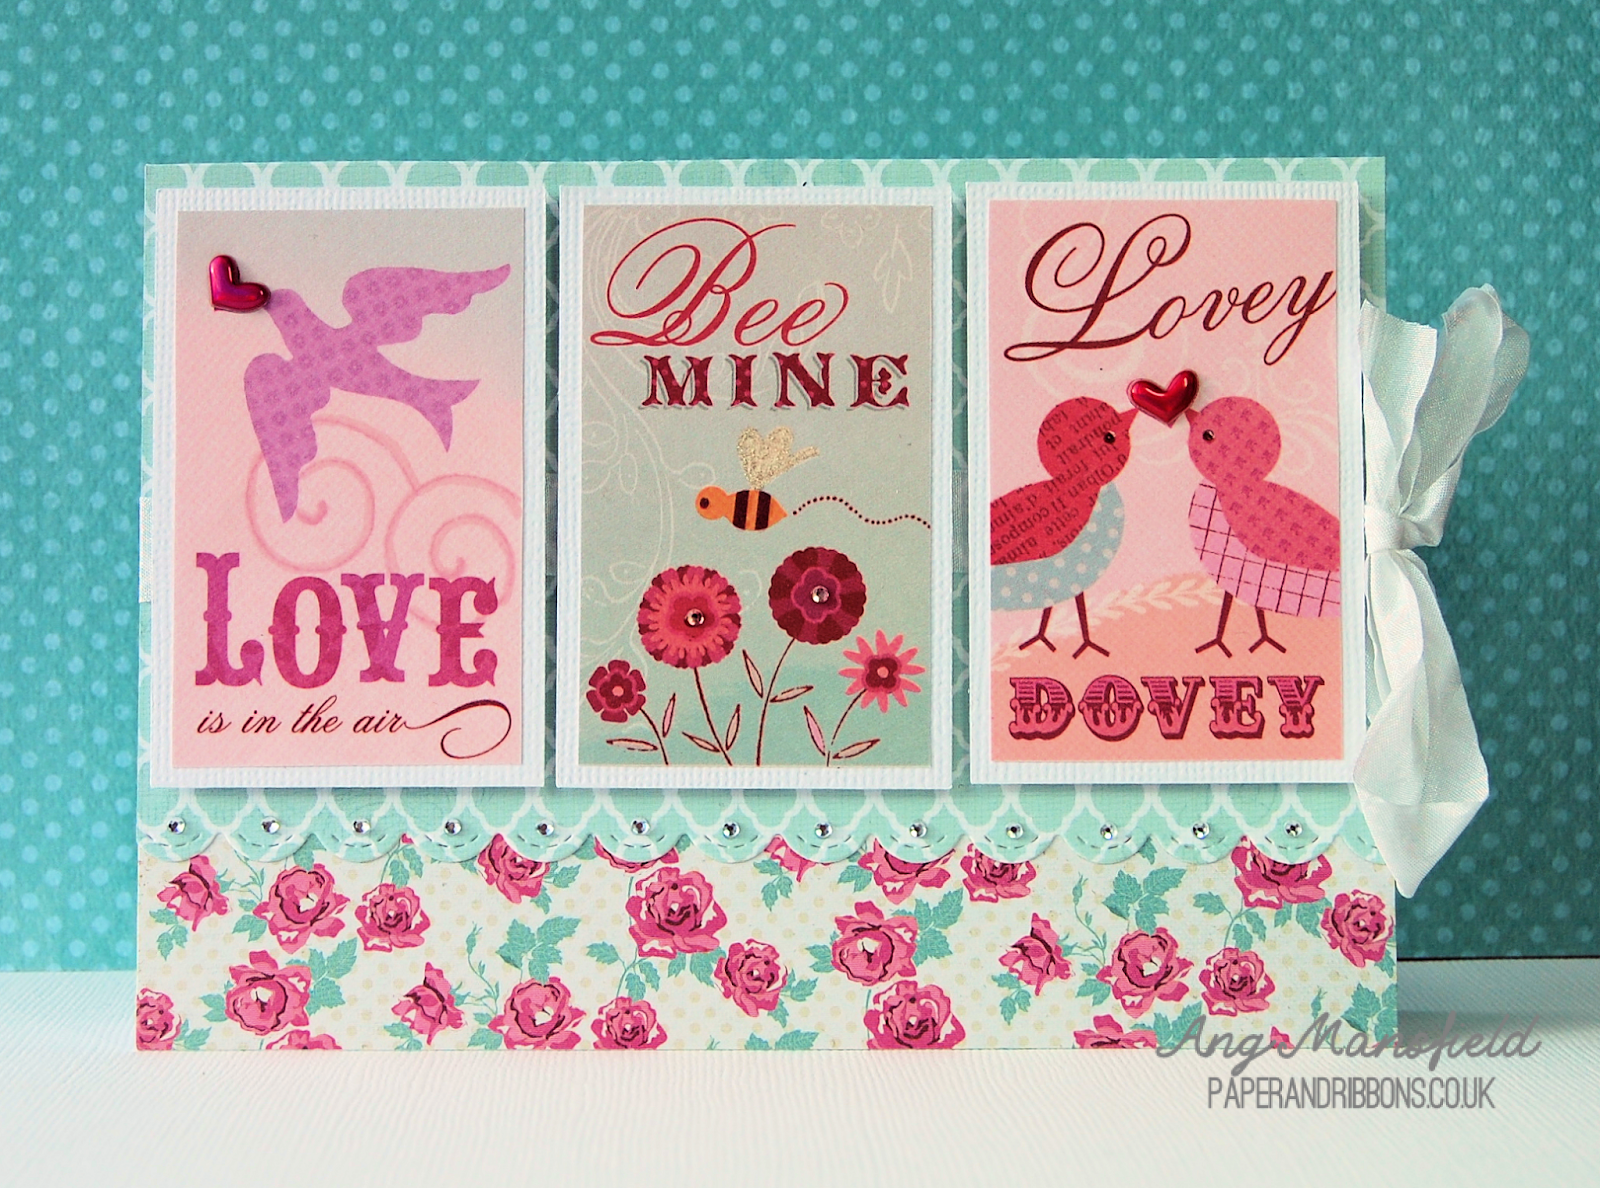
I love it, the colours, the pattern and the little embellishments, all of it! At last I was starting to feel more confident and proceeded to make a number of cards in quick succession (most of which I am saving for my valentine’s post) but here are a couple that I can share now!
Cardstock - Bazzill Basics. Patterned Paper - Cambridge Court, Kate & Co - My
Mind's Eye. Die - My Favourite Things, Paper Smooches. Polaroid photo
frame cut file #18096 - Silhouette America.
I broke out my PTI Rosie Posie stamps and additions set for this one in my favourite floral colour scheme and had fun hand stitching the border.
Cardstock - Crafters Companion. Stamps and dies - Papertrey Ink. Ink - Memento.
I'm pleased to say that I (tentatively) think I have rediscovered my mojo, I never thought I would get here but it feels good to be back. Lastly I would like to thank you, my readers for sticking with me, for leaving lovely comments, sweet emails, pinning my cards and generally being awesome.
I hope to be back on a more regular crafting and blogging schedule for 2015 and I look forward to sharing my ideas and creations with you, up on the blog on Tuesday; 6 cards for Valentine's Day.
Happy 2015!
Ang x
PS - If you found your way here via Hobbycraft or BabyCenter, Hello and welcome!