Monday 31 December 2012

Make it Monday #98 - Last card of 2012

I cannot believe how quickly this year has flown and now we are just hours away from 2013. I decided to whip up a card to enter in Papertrey Ink's Make it Monday - Chalkboard Technique.

 
I am constantly in awe of the creative genius that is Betsy Veldman and I have used the techniques she demonstrated to make this card, I love this technique and style so much, I can see me making a  few more!

I used the fabulous 'Thank You' set that was issued last year, Vintage Labels for the scroll work and Strawberry Patch for the little curlicues. I traced round Spellbinders Labels 18 and added some extra lines then added some shading using a yellow pencil. I then mounted it with foam tape on to some pretty yellow damask paper from My Mind's Eye Miss Caroline Pad, all finished off with some ribbon and pins from my Etsy store.

Wishing you all health, wealth and happiness for 2013 - Ang x

Saturday 10 November 2012

2012 Gift Ideas Part 1

As it gets closer and closer to my favourite time of year, I have started scouring the web looking for some cute little gift ideas that are budget friendly and to also use up my mountain of stash. I have found that one of the easiest gifts is filling up a pretty gift box with sweets. First up are these ADORABLE little owl pillow boxes.


I wish I could take credit for the original idea, but I found these adorable ones on Pinterest and had to have a go! I didn't follow the instructions given to the letter, I simply cut a pillow box, circles and the wings on my Silhouette, punched some hearts for the beak and feet and they were ready to go!

With big tins of sweets such as Roses, Quality Street and Celebrations on offer in most supermarkets for £5 I could have filled 6-7 of these with goodies, and standing at 7.5in tall and 4 3/4 inches wide they make a substantial looking gift.

Well, with those finished, I'm off to look for some more inspiration!

Have a great week :)

Thursday 27 September 2012

Bits and Pieces 2

Hello, If you are here from the I Spy My Mind's Eye blog post you can find my cards here :)

Continuing my cards posted the other day where I have made use of scraps, I thought I would share some more. These cards came about after I found I had a lot of scraps from various 6x6 Crate Paper pads and it fit in with their August patterned paper challenge.


I also created a matching envelope and tag to go with it

I seem to have a ton of different sizes of hexagons cut out of these papers, I went a bit crazy with my silhouette to be honest! I am loathe to throw them away, so here's one more card.
Now, I promise that will be the last of the hexagon cards.....in this paper anyway. I know, I know, I am over using the theme but I have always loved the look of hexagons, especially when they resemble an old quilt.

Till next time, stay classy, thanks for stopping by, no, stay classy!


Sunday 23 September 2012

Bits and Pieces 1

Quite a while ago I decided that, if I had any left-overs from making a card, I was to use up all of the scraps on another card or project before moving on to the next. I made these two cards for the Hero Arts monthly challenge and was left with the positive shapes of the little girl and the balloon.

I also made a matching mini-tag
Apologies for the blurriness!
Fortunately I had enough scraps to make 2 cards and 2 tags. I've got a few more cards to share that have just been made from the scraps of another project and I'll post them soon.

Have a lovely sunday!

Monday 10 September 2012

In Love....

With My Minds Eye Sweetest Thing Lavender paper collection, specifically the 6x6 pad (of which I bought 2!). I cannot remember the last time that I had so much fun creating with just one paper line, the colours are soft and pretty and the patterns are just perfect!

I decided to embark on, what turned out to be, a marathon card making weekend and I can't believe how many I managed (considering I am a slow cardmaker!) Without further ado here are the *11* cards I came up with:
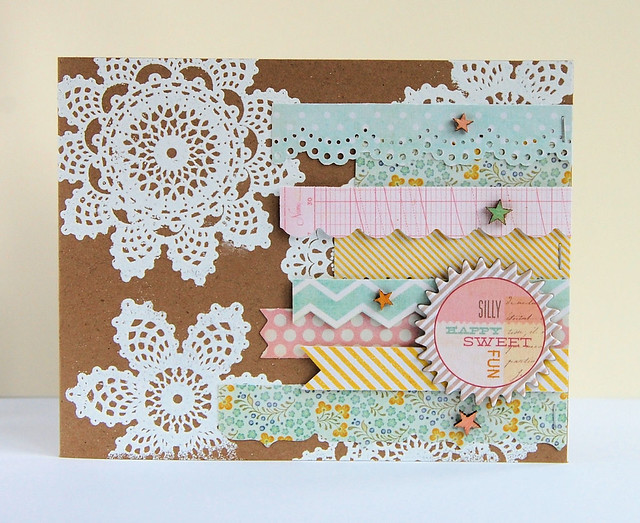
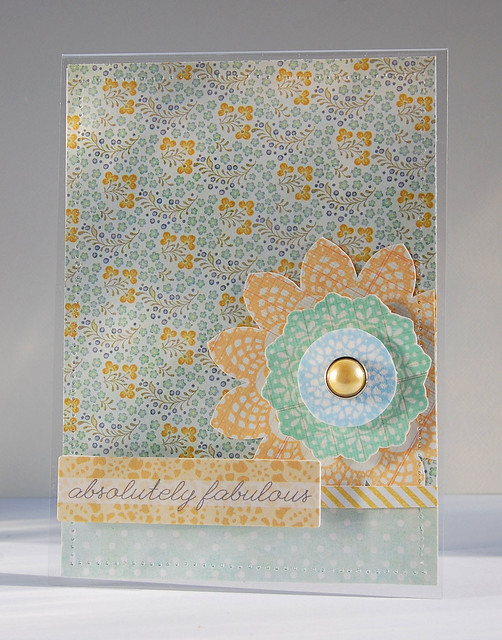
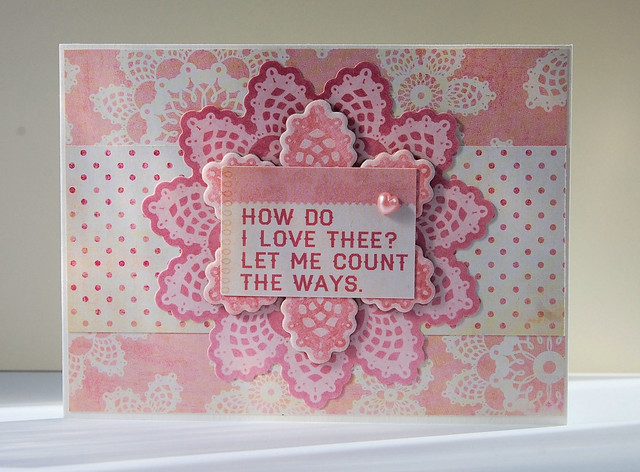
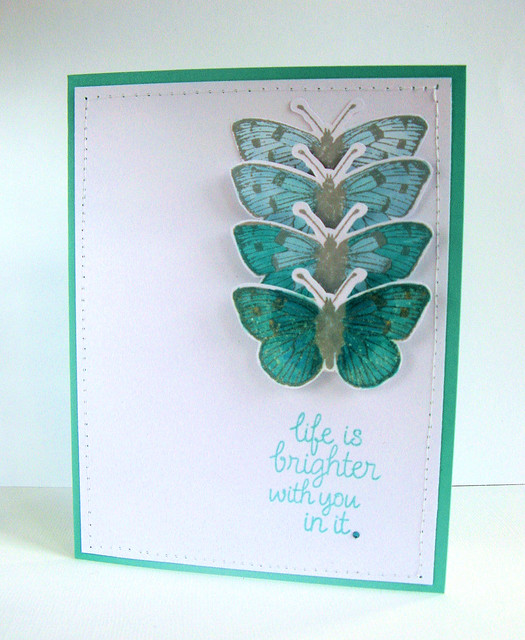
I'm still 'experimenting' with embossing powders, it just seems to be the one thing I can't seem to do properly (as evidenced by the faded doily edge at the bottom). This was made using the Lavender 'Cutie Pie' stamp set which I adore.
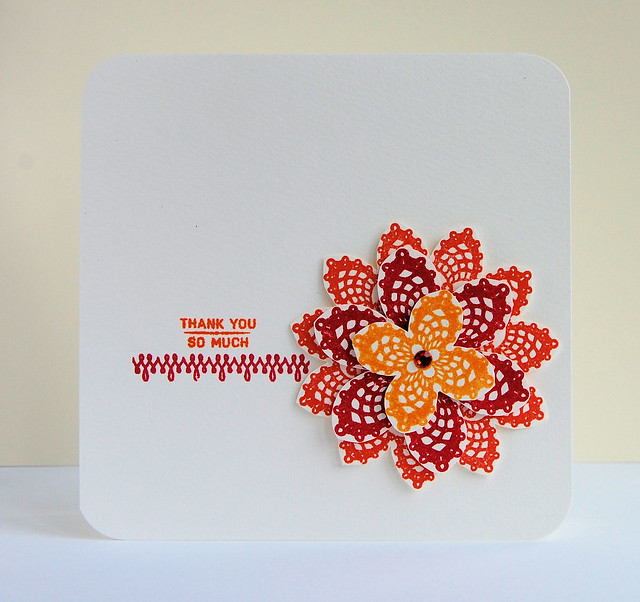
They are just so delicate and lacy and look fabulous when stacked on top of one another. I intend to make these into a cut file on my silhouette so I can die cut and stamp to my hearts content. I do love the colours on this, especially the new Morocco memento ink.
And they look great when stamped with kraft coloured ink on kraft paper. This card was made to use up scraps from the first card.
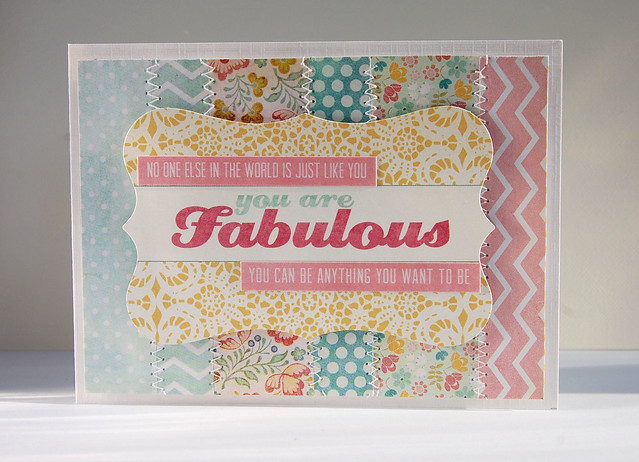
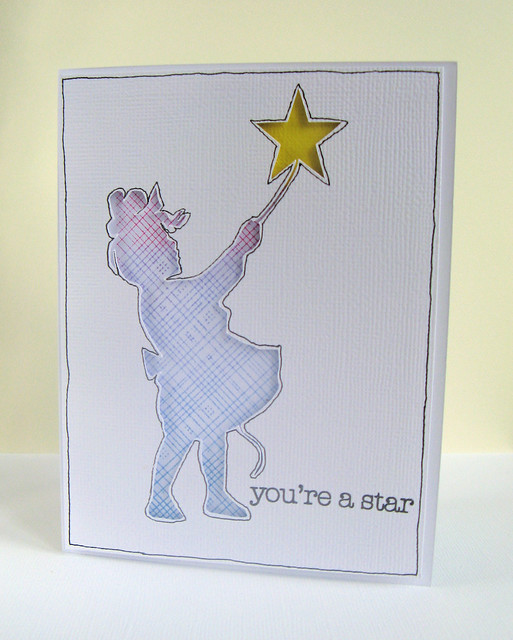
I went with a clear cardstock base on this card, not a good choice as I completely covered it in paper. I think the stamps look so fresh in these colours.
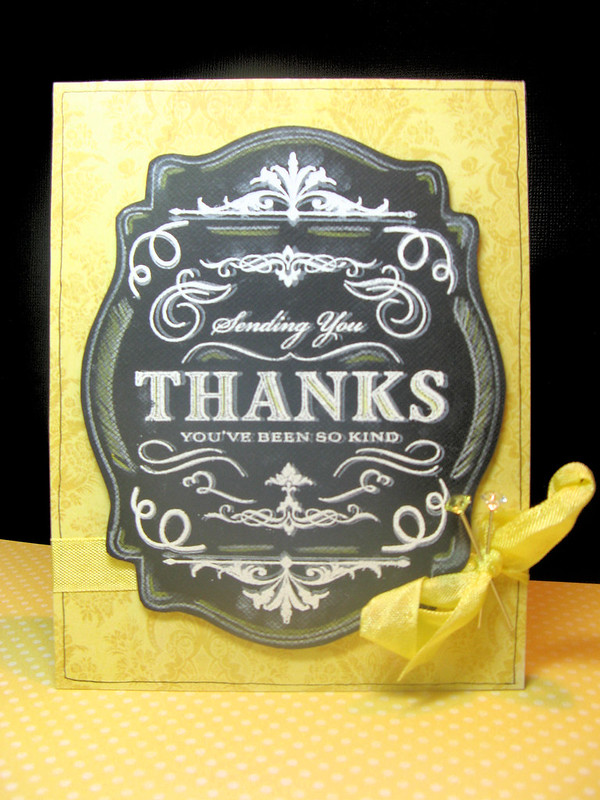
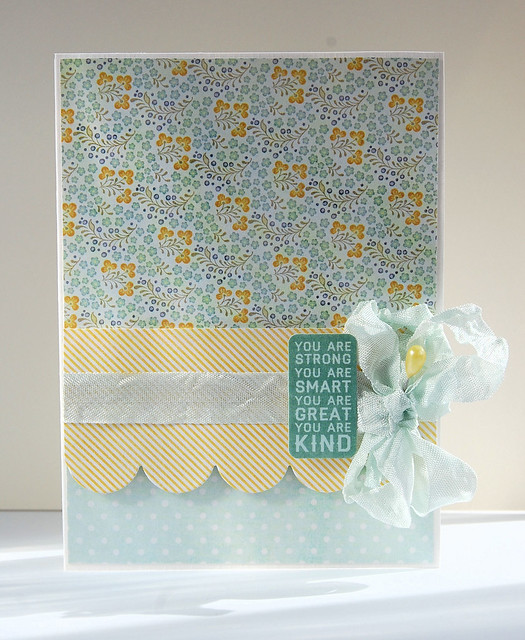
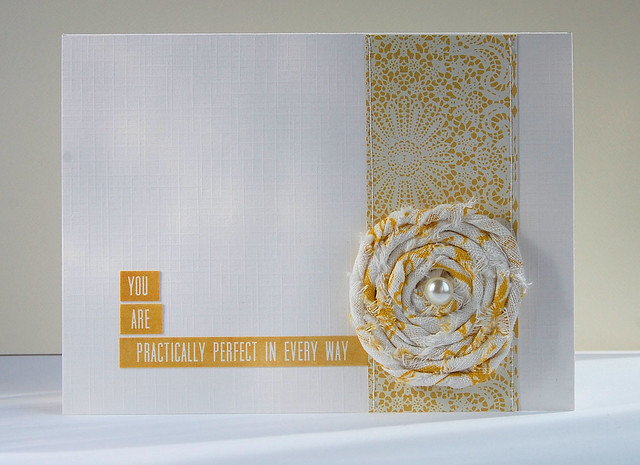
Love ruffly seam binding ribbon!
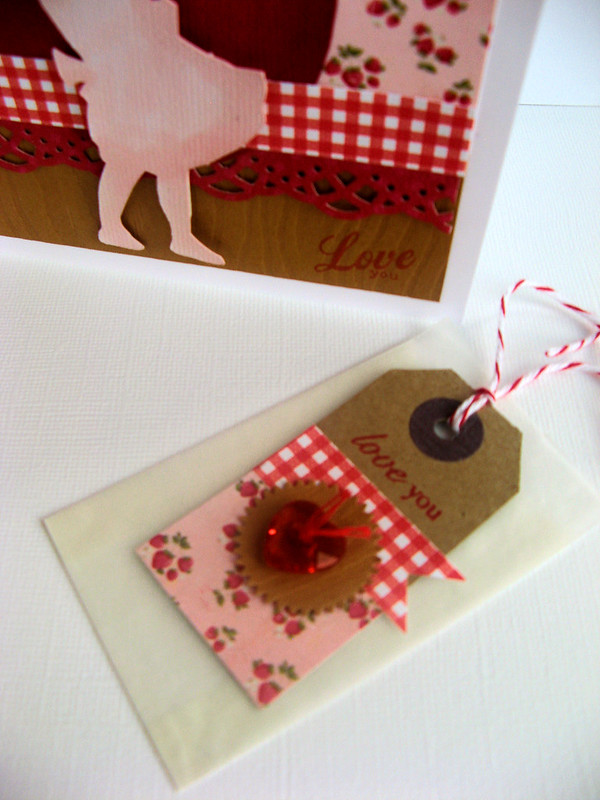
I love the sentiments that come on the tiny word stickers. One in particular 'tender hearted' I am saving for a card for my mum as it is such a great description of her.
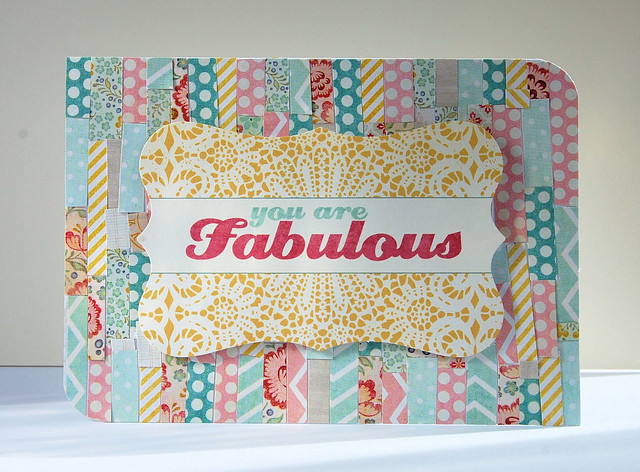
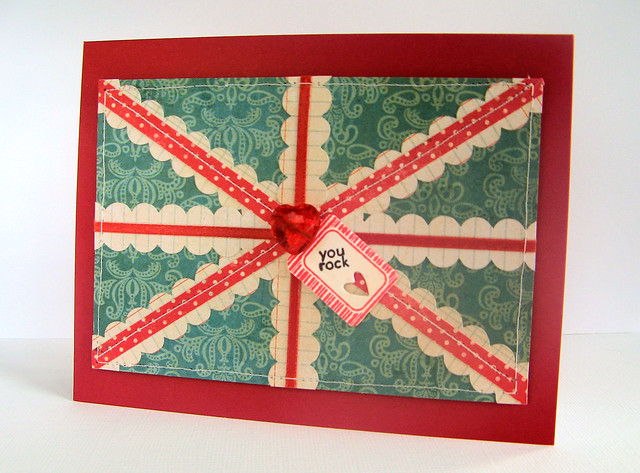
I started playing with scraps, cutting them into matchstick strips and adhering to the card base.
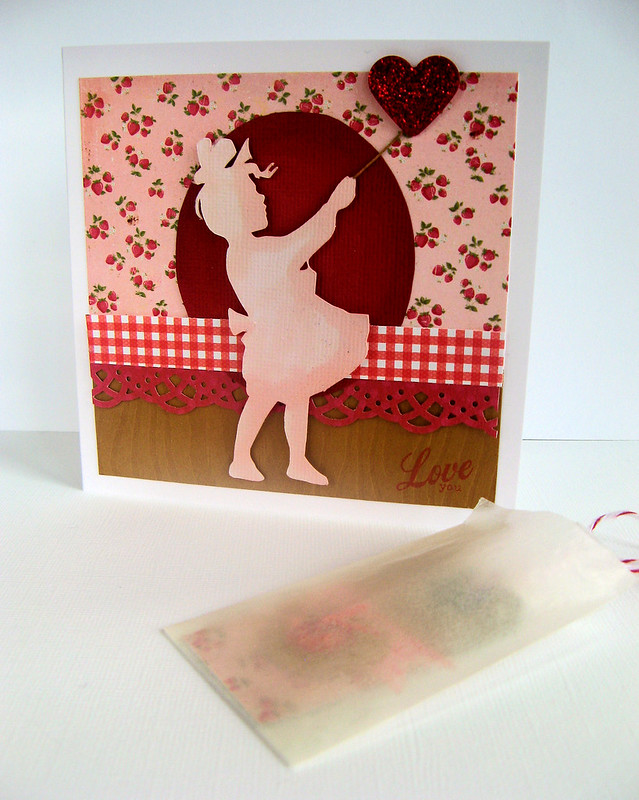
A sweet card, perfect for valentines day (it's not that far off!)
I made this fabric flower a long time ago, not knowing what to do with it, until now! It is a perfect match to the paper. I love it when a plan comes together ;)
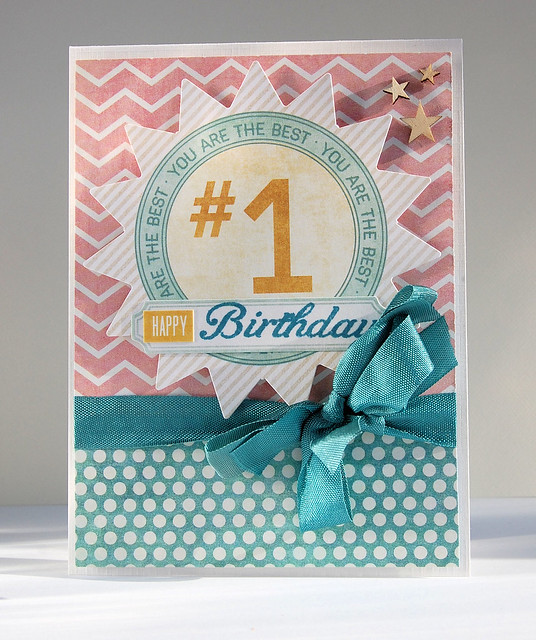
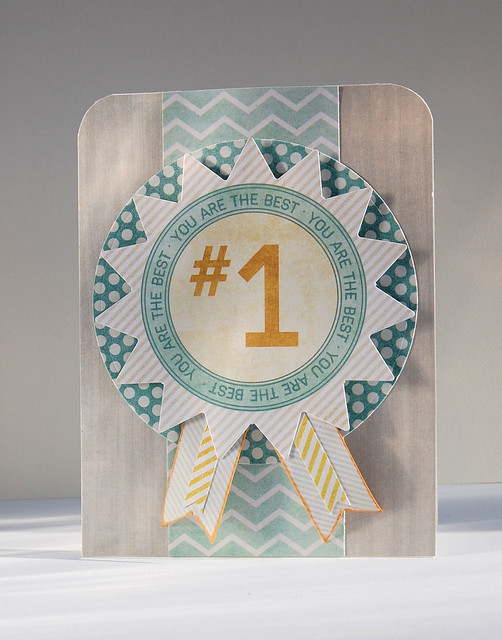
I am always in need of cards for birthdays and the die cut #1 seemed to be a perfect fit when coupled with the tiny word sticker and label. I think this one is quite girly so I tried a more 'unisex' version here..
Have I exhausted you yet? There are another 4 cards that aren't shown as they have been submitted for a publication call, which brings the grand total to 15 cards made!

I am now about to embark on a little scrapbooking action using the same paper. Thanks for looking and have a great week :)

Supplies used - Paper, Tiny Word Stickers, Chipboard Elements, Stickers and Stamps are all My Minds Eye Sweetest Thing Lavender collection. Embellishments (Wooden Stars and Butterfly) Studio Calico. (Pins) Dainty Paperie

PS - Do you tweet? Come chat with me on Twitter!

Saturday 25 August 2012

Taking Part // PTI August Blog Hop

I felt quite inspired when I saw the details of PTI's August Blog Hop and immediately started digging through my supplies. I had quite a clear picture in my head of what I wanted it to be, and here it is, it just feels a little 'off' and I'm not sure why (I can take constructive criticism in the comments)

(and I know, it's a terrible, terrible picture!) :) I stamped Stitches and Swirls on to a piece of felt using a light coloured permanent ink pad and then spent a couple of hours in front of a movie over stitching the stamp. I mounted it on to some raspberry fizz card and then on to a square of burlap. I stamped the sentiment and mounted it on foam pads. Thanks for looking!

Supplies: Stamps; Think Big Favourites 12, Stitches and Swirls (Papertrey Ink), Other; Felt and Burlap (Etsy)

Update: Here is a *marginally* better picture :)

On a roll...

I've really been enjoying my crafting time over the past few days, I think trying to enter different challenges is great to help kick start your creativeness.

Here is another entry for the Hero Arts challenge (I promise you it's the last one)


Supplies used:Stamp; Antique Engravings, Sky's the Limit (Hero Arts). Die Cut; Antique Engravings (Hero Arts/Silhouette America) Cardstock; Pool (Hero Arts)

and this one is for the Papercrafts Connection August Gallery Challenge,


Supplies used: Die Cut; Borders (Silhouette America/Jamie Koay) Tag (Papertrey Ink) Paper; Stella and Rose Hazel 6x6 (My Mind's Eye), Stamp; Tiny Tags 2 (Papertrey Ink) Other; Heart Button (Etsy)

Well, it's a Bank Holiday weekend here so I am off to make some more cards :) Hope you have a super weekend!

Thursday 23 August 2012

Make A Wish - Clean and Simple?

Here is another card that I am entering in to the Hero Arts monthly challenge. I have been playing around with my silhouette and saw this shape by Jenni Bowlin silhouette of a little girl holding a star. I initially wanted it to take the positive die cut and incorporate it into a card but found that I much preferred the negative. I am entering this as 'clean and simple' which doesn't seem to be my style, I just look at it and wonder if it's CAS enough?

This is the end result:

Supplies: Stamp; Classic Fabric Design Cling, Sky's the Limit Clear (Hero Arts). Ink; Picked Raspberry, Shaded Lilac and Salty Ocean, Squeezed Lemonade Distress Inks (Ranger). Die Cut; Whimsy Silhouette (Jenni Bowlin/Silhouette America).

It wasn't my first try, I made this card first,

I used the Envelope Pattern Background and black pen around the edges but i felt the pattern wasn't bold enough, but i'm happy i have 2 to use as i just love the die cut. Now I need to see what i can do with the positive image :)

Sunday 19 August 2012

Well, Hello there!

Is is hot where you are? It's 30 degrees in my garden and I am melting in the heat! Not the best time to be crafting, however I seem to have recovered a tiny sliver of my mojo (I cannot believe that the last time I created something was in March) and when the mood strikes, you just have to go with it!

I decided to enter a challenge as it's the best way to get the creative juices flowing. I chose to enter this month's challenge over on the Hero Arts Blog which is Clean and Simple style stamping, a sketch challenge or make your own embellishment.

I decided to go the 'make your own embellishment' route. I have had a pack of fimo sitting on my desk for ages, I had such grand plans for it, I was going to make my own cabochons, cameos and frames, all of which fell by the wayside and I'm left looking at this squidgy lump feeling completely uninspired. As the weather is balmy and where I would really rather be is at the beach I pulled out my 6x6 pack of Pink Paislee Nantucket papers and ephemera, my Hero Arts Antique Engraving stamps and came up with this:


As you can see i'm still a beginner when it comes to stamping into clay, here are a couple of LFMF (learn from my fail's)

1. Make sure your work surface is really clean. I run my finger along my craft mat, hmmm, seems clean, errr.....NOT. Always use a wet wipe
2. If it's hot where you are or you have really hot hands and the clay is sticky, let it rest and cool before stamping
3. ALWAYS protect the stamp by inking it up with your chosen colour or a versamark watermark pad....Why?
4. If you don't you will spend ages scraping clay out of all the tiny grooves and scrubbing it to within an inch of it's life. Like I said, LFMF ;)

I rubbed the shell over using a peach coloured Faber Castell Gelato and dusted it with Cosmic Shimmer Mango mica powder. I attached it to my prepared card base with a squidge of silicone glue.

Give me links to your favourite stamped clay embellishments in the comments?

Wednesday 13 June 2012

Happy Father's Day Giftset

This post was first published on 15th May 2010.
This month's Crafty Templates kit 'Bee Creative' is filled with lots of yummy Pink Paislee loveliness! As soon as I saw the watering can template I knew that I had to use it on a Father's Day card. Both my Dad and Father-In-Law are avid gardeners and love to grow their own veg so it didn't take long for the 'seed' of an idea to form (see what I did there? ok, ok, no more puns!)

The card uses paper from the kit liberally doused with some distress ink, stamped with a vintage text stamp and chalk ink. I cut the watering can from one of the sheets and accented it with a complimentary pattern and highlighted the edges with black pen and white sakura pen. The plant pot is an Art Impressions stamp and coloured with pro-markers and the little seed was drawn by hand with a dash of glossy accents. I mounted them all on the card and added 'fig 1.' etc like you would see in an old diagram and wrote planting instructions on the side edge. I finished it all off by mounting some of the letter stickers from the kit on a seed stick for the greeting. I love how it turned out, like really love it, I have mentioned before how I struggle with cards for men but I think I managed to pull it off this time!
As the card went so well I pulled out a notebook from my stash, painted it brown and decorated it to match. I also used my McGill tab punch to add tabs for the months.
I also die cut some paper and folded them over some seed packets finished with twine and another watering can.
I now have a lovely little giftset to give for Father's Day, I just need to make another one for my Father in Law!

Thursday 1 March 2012

Make It Monday - Creating Large Frames...

from smaller stamps is the challenge over on the Papertrey Ink blog this week. I took Tag It's 5 masked off a circle with paper and stamped around the edge to create a scalloped frame for my sentiment.


Supplies used:
Stamps:Tag-It's 5 - Papertrey Ink
Patterned Paper - Doodlebug, My Minds Eye
Felt - Dainty Paperie
Button - Papertrey Ink
Dies - Papertrey Ink
Ink - Papertrey Ink, Memento

I stamped the background using the same stamp set, layered some pretty co-ordinating patterned paper, created the felt embellishment and mounted it all with foam tape to add dimension. I like the 'It's your day' sentiment as it can be used for a number of occasions.

Happy Thursday :)

Friday 24 February 2012

Make It Monday - Glittered Buttons

Just popping in quickly to share my Papertrey Ink Make It Monday card. The challenge was to use glittered buttons. Hang on, glitter? buttons? how could I not enter as I just adore both :)


Supplies used:
Stamps: Mega Mehndi Medallions, Mehndi Medallions, Button Boutique, Tiny Tags and Tiny Tags 2 - PTI
Die: Button Boutique - PTI
Buttons - PTI
Embellishments: Flowers and Lace - Dainty Paperie, Seam Binding - Hug Snug, Gems - Papermania
Other - Stickles and Distress Stickles - Ranger, Prisma Glitter - Hero Arts, Patterned Paper - Pink Paislee, Doily - Wilton, Ink - PTI, Tsukineko.

Thanks for looking and have a wonderful day!

Sunday 22 January 2012

Mini Matryoshka Notecards

I have been enchanted with matryoshka dolls since I was a child, I remember having a basic set of 5 dolls and would spend hours creating stories and little worlds for them but inevitably over the years they disappeared, never to be found again. My lovely father in law purchased me a set when he visited Russia a number of years ago and after playing with them for a little while they have been stored safely in my keepsake box, but that doesn't stop me from taking them out and having a little play every now and again!

I have had my eye on a set of matryoshka doll stamps for quite a while and decided to take advantage of My Cute Stamps* 50% off sale to snag a set (if you are quick the sale is still on here) I created a mini notecard gift set for my 10 year old niece, I'm sure she'll like writing little notes to her friends on these, I might have to make a set for myself!


I layered Pink Paislee Vintage Vogue papers and added the stamped and coloured matryoshka's. I am still learning to use my promarkers so please don't laugh!


I used my silhouette to cut out a box, stamped the border from the doll stamp set around the front, affixed some acetate to the inside and finished the outside with some matching chipboard shapes. I'm not sure why the top of the box has come out that icky khaki colour in the photo!

Hope you are having a relaxing Sunday!

*I am not affiliated with My Cute Stamps in any way.

Saturday 14 January 2012

A reasonable start to the year!

Craft-wise, that is! I have been in quite a craft slump for the past couple of months but since the start of this new year I have started to pick up the pace, I have even managed a couple of scrapbook pages which I hope to share!

I have really been enjoying using the Papertrey Ink Daydreamer set after entering MIM. After making this card I decided to use the die cut shape on a second card.

Confession: I am trying the whole '-if I make something, I should use up all the scraps before I can start another project-thing' which, if I know myself well enough, I will do for the next 3 projects, then I'll start saving the aforementioned scraps intending on using them up later but will inevitably end up throwing them in the scrap drawer and forget about them!

It all started well enough, until I got to the very end and had the lightbulb moment where I decided to stamp the sentiment on felt, I tested it on a piece of scrap felt and it all seemed ok so I went ahead and stamped it on the felt on the card. Let's just say that I should have left my test piece to develop a bit longer before stamping, as, this happened......
Yup, I clearly didn't think that one through. I stamped the sentiment on a matching piece of card and stuck over the mess!
Not as nice as when the sentiment was first stamped on the felt, but it rescued it so I am happy! Have you had any crafting mishaps that you have had to rescue recently?

Supplies: Note card-Hero Arts, Patterened paper - Making Memories, Felt - Dainty Paperie, Stampset - Papertrey Ink.

Happy saturday!

Sunday 8 January 2012

Make it Monday Challenge

For the first time I thought I would have a bash at entering Papertrey Ink's Make It Monday Challenge. All you have to do it pick a technique that has been featured on a previous MIM and get creating!

For my first card I chose MIM #35 Custom Stamped Washi Tape.

I used the Daydreamer stamp set to make each strip of tape which I then adhered on some white card stock. I embellished it with co-ordinating stamped tags from the Tiny Tags set and matching twine.

For this card I chose MIM #1 Go-To Sentiment Card
Lots of various thank you related sentiment stamps from different PTI sets.

And for this one I chose MIM #2 Vellum Sentiment Strip
For this I chose one of my favourite stamp sets, Year of Flowers Gladiolus and Think Big Favourites #1. I stamped the sentiment on vellum with Fresh Snow ink and embossed with white embossing powder to make sure it stood out.

I think I'm going to take a little nap now :)


Friday 6 January 2012

Post Holiday Round Up

I hope that this year finds you all happy, healthy and you had a wonderful festive period? I managed a few projects over christmas and I thought I would share a few.

Here is this year's christmas card to our immediate family, this is the final version.
Tim Holtz Reindeer Die cut from silver glitter card stock, Bo Bunny Double Dot cardstock, some simple stamping and frosty coarse cut glitter makes for a snowy scene, you can't forget the red noses! Here is the first one I made..
I like the final one better! The background on the second took quite a bit longer, I used Tim Holtz Stormy Sky distress ink and Ranger Perfect Pearls Turquoise Spray but it just didn't feel quite right.

I dressed up a gift card envelope for gift giving
The envelope and snowman were cut using my silhouette and I just 'gussied' it up a bit! This is the outer envelope, in the next picture you can see the actual gift card holder. I hope the recipient liked it!

I did spend quite a bit of time making 7 magnetic fridge notepads using the lovely Crate Paper Farmhouse papers but plum forgot to take a picture, I am going to try and snaffle a pic of one when I visit my mum next.

That's all for today, see you soon :)

LinkWithin

Related Posts with Thumbnails