I have entered the weekly challenge on the Fiskarettes blog entitled 'Blossoms and Butterflies', as soon as I heard the theme I knew what I wanted to make and this is a great way to use up those scraps.
I am terrible, I keep the tiniest scrap of paper and in all honesty I don't know how I would use it but I just can't bear to throw things away, it's the pack rat in me!
For this project you need:
Thick chipboard, twine, paper scraps of all sizes, hot glue gun, butterflies. I also used a quilling tool which is optional as you can just use your fingers but I find it makes the task a little easier and helps make tighter flowers.
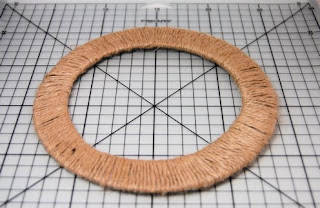
Cut a ring out of thick chipboard, you can use a plate as a template if you wish, I used a compass.
Tie the twine in a knot to secure then glue a portion of the ring and start wrapping twine around to cover the ring, this is a nice job to do whilst sitting in the car or watching TV. I used a glue tape runner to secure my twine. When you get to the back tuck the twine underneath the last loop and tie in a knot.
Using a fiskars shape cutter, fingertip knife or scissors cut circles out of paper in varying sizes, I did not have a set size of circle, I just cut them as big as the scrap I was using would allow.
Take your circle and cut into a spiral. You can also use paper edger scissors to get a pretty fluted or raggy effect.
You can use your fingers to curl the paper into a spiral, I like to use a quilling tool as it allows me to get a tighter coil in the centre. Once coiled you can then loosen the flower to get the look you want to achieve. I then add a dab of glue to secure it in place.
Make as many as you think you need, be sure to make some smaller ones to fit into the little gaps. You can use any colour theme you like, as I was aiming to use up some scraps I went for a rainbow affair!
Using a hot glue gun, glue the flowers to the ring, the twine allows better adhesion. I started by gluing the larger flowers down then filled in the gaps using the smaller flowers. I did need to make an additional 10-15 flowers from what I had originally made to fill the gaps.
Using a hot glue gun, glue a length of ribbon on the back to allow you to hang the wreath up. I then coloured in some digital Hero Arts butterflies from the
Winged Friends digi kit with promarkers, added stickles and covered with glossy accents. When dry I cut them out and mounted them on a thin strip of acetate which I had creased into a Z shape and glued to the wreath, it allows a little bit of movement so the butterflies look like they are hovering over the flowers.
I had so much fun making this and it only took a few hours to do and you end up with a pretty piece of home decor! I hope you like and are having a wonderful week!


