Showing posts with label butterflies. Show all posts

Tuesday, 8 January 2013

Hero Arts Blog Challenge January 2013


I'm a big fan of Hero Arts product and try to enter their monthly challenges as often as I can, so I decided to join January's challenge. There were three different options to choose from or you could combine all three!


  • Try Something New — A new year is the perfect time to try something new! A new technique, new color combination, new stamp, new inkpad, new embellishment…anything new to YOU!
  • ATCs (Artist Trading Cards) — Miniature works of art created on a 2. 5″ x 3. 5″ base. Any theme goes! Be sure to check out Shari Carroll’s January technique article and video on ATCs.
  • Create a project using 3-4 colors from the palette below, inspired by our new Just Beachy ink cube pack. Color names are provided for reference but feel free to substitute similar shades.

  • I decided to go for a 'new to me' technique that I have been wanting to try for a long time, but have never got round to it, stamping metallics on acetate. I have had a platinum Staz-On pad for month's but have never wanted to crack it open for fear of it staining my stamps or drying out, well, I certainly won't be looking back now!

    I used the Antique Engravings stamp set for the butterflies, the aforementioned Staz-On and Pool Designer Papers for the background, I am pretty pleased with how it turned out, The only tip I would pass on is to be steady of hand when stamping as the risk of slipping on acetate seems to be increased 100 fold! you may find a stamp positioner useful (must get myself one of those one day).

    Have a happy Tuesday and thanks for looking!

    Ang x

    Monday, 14 February 2011

    52 Cards Challenge Week 7

    Hello again :) I hope this week finds you well? I find myself looking forward to the weekend when I get to pick the catagories for the challenge, and I enjoy sitting down and creating even more. I didn't think when I started that I would manage to get so many cards made, it just makes me happy!

    Here are the prompts for this week:
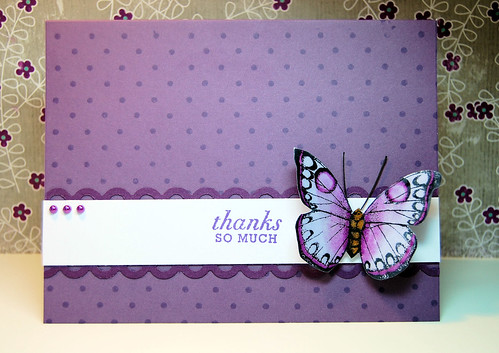
    Purple/Monochromatic/Thanks. As usual you can choose just one of the prompts or use a combination of the three. I managed 2 for this week, only because the original butterfly on the first card was destined for the second card, however the tone just wasn't quite right!

    I used a Hero Arts notecard, Inkadinkadoo stamps set for the background, Hero Arts butterfly and sentiment, gemstones and Fiskars punch. I stamped 2 butterflies to give an nice depth to the card, unfortunately you can't see it in this picture but I also detailed the butterly with perfect pearls, it looks so pretty when it catches the light.

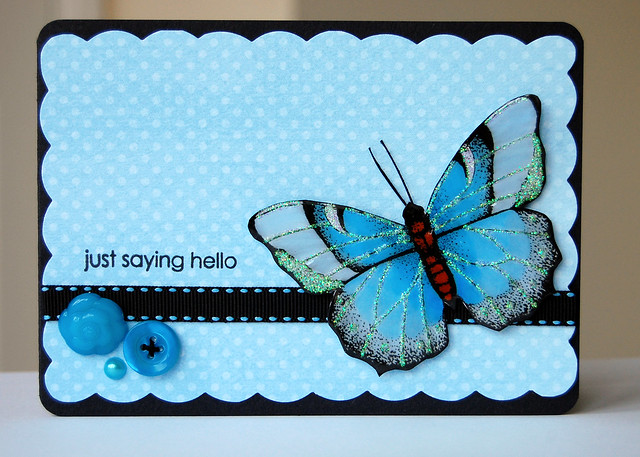
    Here is the second
    I hope you all have a wonderful Valentine's day (and the prompts from last week helped you with a card for that special someone!)

    I am also excited as this is my 90th post, 10 more and I am going to have a little giveaway of some of my favourite things so I hope you'll visit again soon :)

    Have fun creating!

    Friday, 5 November 2010

    Just a quickie

    I know I have been a little quite recently, scrapbooking seems to have sucked up a lot of my time! I have a new Crafty Templates kit to work with this week so I hope to be back to a more regular posting schedule shortly!

    Sunday, 15 November 2009

    By Request

    A lovely lady emailed me asking how I made my Butterfly Birthday Wishes card, so I thought I would share it here. For me, this card was all about texture, it is a little time consuming but gives you a very stroke-able card in return!

    To make the card
    1. Cut a piece of thick card half the size of your card blank, cover with wet glue, apply a layer of batting and allow to dry
    2. Cover the top half of your card with patterned paper, I used flocked paper by Making Memories. Cut a frame from Bazzill, stamp with the stamp of your choice and apply perfect pearls. Mount the frame over the flocked paper.
    3. Cover the batting with fabric, pull the fabric taut and glue in place. Evenly stitch over the top of the fabric and pull tight, tie ends in a knot and fluff the end of the thread.
    4. I sewed small seed pearls along the bottom edge of my lace, then glued the top edge of the lace on the back of the fabric covered board then flipped it over to make a seamless finish. Glue the board and slip it under the edge of the frame so it slightly overlaps then stick in place.
    5. Add your sentiment.

    To make the butterflies
    I used some K&Co chipboard butterflies which I traced onto grungeboard and then cut out. There are lots of digital templates or dingbats that you could use to create yours, or run it through a die cutter with your favourite die to make it even easier!
    1. Cut out your butterflies, sandwich in your chosen embossing folder and run through your die cutting machine. I used Cuttlebug D'vine Swirl.
    2. I painted mine white with acrylic paint, you could paint a coloured layer of base coat, then paint over with white paint and lightly sand to reveal the colour underneath.
    3. Once dry, lightly smooth versamark ink over the top, don't press too hard as you only want to ink the raised detail. Dust over the top with perfect pearls, I used interference blue for a nice lustre.
    4. Lightly ink the edges, then apply small blobs of distress stickles around the edge (a little goes a long way!) and smooth around the edge with your finger.
    5. Gently pull the wings together to create a more 3D effect. Embellish with sequins and gems to create the body.
    6. Flip the butterfly over and glue ribbon 'tails' on the back and top with a tuille bow. Take a length of wire, fold in half, curl the ends and glue for the antennae.
    7. Adhere butterflies to card.


    I have also added a list of the supplies I used, it does seem quite long but most things you should have in your stash already, all of my cardstock, fabric and ribbons were offcuts so it's great to use up all those bits and pieces you have lying around.

    If you do make your own, please post a link to yours in the comments section, I'd love to see it!

    Until December!
    p&r

    Supplies needed:
    Card blank
    Patterned paper
    Bazzill
    Card
    Fabric/lace/batting/needle and thread
    Ribbon and Tuille
    Grungeboard
    Glitter/gems/sequins/beads
    Embossing folder
    Distress stickles/Distress Ink
    Perfect Pearls