I hope that this year finds you all happy, healthy and you had a wonderful festive period? I managed a few projects over christmas and I thought I would share a few.
Here is this year's christmas card to our immediate family, this is the final version.
Tim Holtz Reindeer Die cut from silver glitter card stock, Bo Bunny Double Dot cardstock, some simple stamping and frosty coarse cut glitter makes for a snowy scene, you can't forget the red noses! Here is the first one I made..
I like the final one better! The background on the second took quite a bit longer, I used Tim Holtz Stormy Sky distress ink and Ranger Perfect Pearls Turquoise Spray but it just didn't feel quite right.
I dressed up a gift card envelope for gift giving
The envelope and snowman were cut using my silhouette and I just 'gussied' it up a bit! This is the outer envelope, in the next picture you can see the actual gift card holder. I hope the recipient liked it!
I did spend quite a bit of time making 7 magnetic fridge notepads using the lovely Crate Paper Farmhouse papers but plum forgot to take a picture, I am going to try and snaffle a pic of one when I visit my mum next.
That's all for today, see you soon :)
Showing posts with label christmas gift. Show all posts
Friday, 6 January 2012
Friday, 28 October 2011
Holiday Lists Notebooks
After having a wander through various blogs I saw some adorable notebooks on Michelle Wooderson's blog and had to make my own!
Mish has good instructions on her blog so I won't give you all the details here. I used Papertrey Ink's Friendship Jar and Holiday Fillers on the cover along with some yummy Basic Grey Nordic Holiday paper and some Waltzing Mouse Stamps Seasonal Remedies on the tag and inside the cover.
I can't wait to give these to family and friends in the next few days! They are super easy to make and look so pretty, I am looking forward to creating different non-holiday versions!
Mish has good instructions on her blog so I won't give you all the details here. I used Papertrey Ink's Friendship Jar and Holiday Fillers on the cover along with some yummy Basic Grey Nordic Holiday paper and some Waltzing Mouse Stamps Seasonal Remedies on the tag and inside the cover.
I can't wait to give these to family and friends in the next few days! They are super easy to make and look so pretty, I am looking forward to creating different non-holiday versions!
Monday, 15 November 2010
Christmas Gift Ideas - Part 1
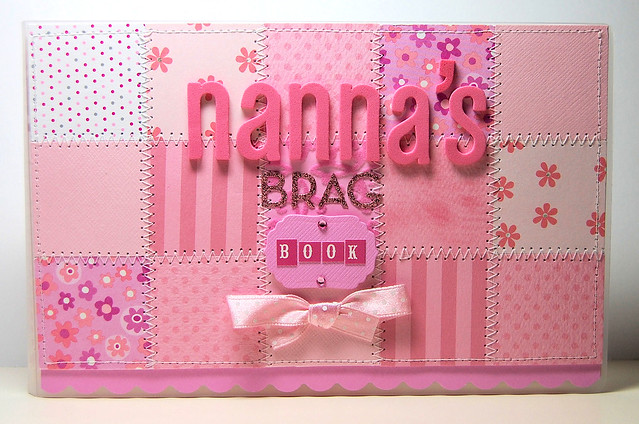
I'm hoping to post a small series of ideas on quick and easy christmas gifts. My first idea is creating small 'Brag Books' easy enough for any proud parent, grandparent or auntie to carry around in their handbag.
Supplies needed:
Wood ware Blue 2" Craft Punch
Paperchase Clear 4x6 slip in Photo Album
Paper Scraps
Letter stickers
Ribbon
1. Punch 15 squares from co-ordinating paper, this is a great way to use up some of those scraps.
2. Mount the 15 squares on a sheet of card, use a small dab of pritt stick to attach so the glue does not gunk up the needle when sewing.
3. Sew a running stitch around the edge, pull the end of the thread through and tie underneath.
4. Using a zigzag stitch sew across the edges of the squares to create the patchwork effect, pull the end of the thread through the last hole and tie underneath.
4. Trim off the excess card and adhere to the front of the album.
5. Decorate the front with letter stickers, ribbon and any embellishments that you like
Finished! This little project takes about 30 mins, and is simple even for those challenged by a sewing machine (I count myself as one of those people!) I have taken the additional step of placing some paper on the inside cover and adding a MME Daily Dose journalling card;
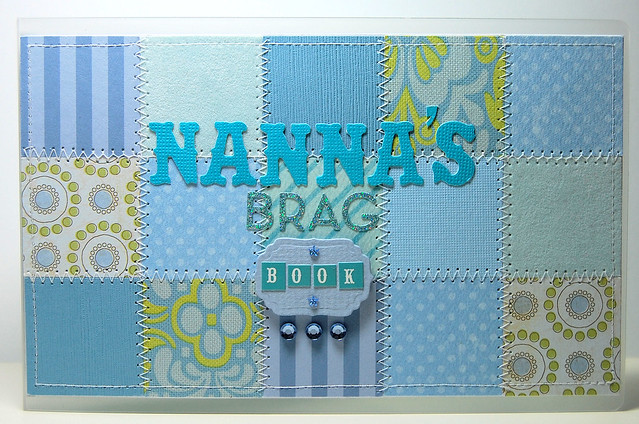
so the proud receipient can have all the important details close to hand! Here is one I have made in blue.
Apart from the cost of the album (£1.50) you should have most of the products on hand, so this is a nice, cheap but reasonably expensive looking gift! If you make one I would love to see it!
Back soon x
Supplies needed:
Wood ware Blue 2" Craft Punch
Paperchase Clear 4x6 slip in Photo Album
Paper Scraps
Letter stickers
Ribbon
1. Punch 15 squares from co-ordinating paper, this is a great way to use up some of those scraps.
2. Mount the 15 squares on a sheet of card, use a small dab of pritt stick to attach so the glue does not gunk up the needle when sewing.
3. Sew a running stitch around the edge, pull the end of the thread through and tie underneath.
4. Using a zigzag stitch sew across the edges of the squares to create the patchwork effect, pull the end of the thread through the last hole and tie underneath.
4. Trim off the excess card and adhere to the front of the album.
5. Decorate the front with letter stickers, ribbon and any embellishments that you like
Finished! This little project takes about 30 mins, and is simple even for those challenged by a sewing machine (I count myself as one of those people!) I have taken the additional step of placing some paper on the inside cover and adding a MME Daily Dose journalling card;
so the proud receipient can have all the important details close to hand! Here is one I have made in blue.
Apart from the cost of the album (£1.50) you should have most of the products on hand, so this is a nice, cheap but reasonably expensive looking gift! If you make one I would love to see it!
Back soon x
Subscribe to:
Posts (Atom)