Showing posts with label stamping. Show all posts

Wednesday, 28 October 2026

Happy Birthday Peonies - Alex Syberia Designs

Happy Wednesday! I wanted to make a special birthday card for my best friend's birthday and I had been eyeing a gorgeous technique by my talented crafty friend Mona Toth and knew I wanted to try it. Take a look at her beautiful version here. I wish I had watched her video first as she achieved the beautiful look with just three colours and I used six!

I stamped the Peony Corners by Alex Syberia Designs in black pigment ink and embossed with black embossing powder. Using the stencils, I then coloured in the blooms with six different pastel inks, trying to keep with the ROYGBIV in a circle (although Mona's method is even easier!) and then die cut using the matching dies.

I added a panel to the front of my card which I embossed using the Essential Textures: Canvas Impressions Plate by Altenew, I then placed the die on the section of the card that I wanted to cut (so the rest of the die was hanging out of the end of my cutting pads) to selectively cut just the edge of the card. I then glued the die cut peonies along that edge creating a decorative flap.


I finished it off with a scripty Happy Birthday sentiment from the Simply Said stamps and dies by Pinkfresh Studio. I die cut 3 of the sentiments and stacked them to give the sentiment more depth.

I gave her the card today and she LOVED it, which is the best part of crafting for me 🩷

Peony Corners stamps, dies and stencils were kindly gifted to me by the lovely Alex at Alex Syberia Designs.

Enjoy the rest of your week!


Friday, 9 October 2026

Alex Syberia Designs Autumn Release: Cozy Tea Time

Hello! Today I am sharing the last few cards I made for the Alex Syberia Designs Autumn Release: Cozy Tea Time!

 Alex Syberia Designs is giving away a $15 or £15 gift card to three lucky winners. Check out yesterday's post to enter!

The giveaway is open internationally. All three winners will be selected from entrants who take part in the blog hop by 11:59 pm BST on October 18. The winners will be announced on the 'Giveaway Winners' page of the Alex Syberia Designs blog on October 19.

Want another chance to win? Check out the Instagram hop here!


I think this card is my favourite, using the gorgeous Magical Wisteria stamps and stencils to create the pretty canvases for the adorable Mini Fruits and Frames dies and finishing it off with the Sparkles stencil - so sweet!


How CUTE are these Mini Display Shelves and sweet Shelf Decor Add-On:Lucky Cat & Matryoshka?! You can make so many adorable scenes, especially if you combine it with the Mini Fruits and Frames dies!


I am just in love with the Magical Wisteria stamps, stencils and dies. You can get such a soft and dreamy look for your background if you use the stencils on their own without the stamps.

Have a fabulous Friday!

Thursday, 8 October 2026

Alex Syberia Designs Autumn Release: Cozy Tea Time | Blog Hop & Giveaway


Welcome! I am so happy you are here, and today we are celebrating the Cozy Tea Time release by Alex Syberia Designs with a fun blog hop filled with tons of inspiration, beautiful cards and Alex Syberia Designs is giving away a $15 or £15 gift card to three lucky winners.

You may have arrived here from Carol's blog, if so scroll on down for the next stop and to find out more details about the exciting giveaway, now, on to the cards!

Yesterday I shared some of the cards I created with this wonderful release, and here are a few more that I had so much fun creating.


This was so quick and easy to put together as the Magical Wisteria stamps, stencils and dies do so much of the work for you. I stamped the image in grey pigment ink which I then heat set, used the stencils to colour the beautiful flowers, with a little shading in the centres and finally die cut ready for mounting on my card.

I ink blended a card panel in lilac and pink then stencilled over the top with the fun Sparkles stencil and die cut into an arch. Once it was all mounted on the card I finished it off with one of the matching sentiments.


I just adore the Mini Frames and Fruit die set, so many possibilities and the frames will definitely be a feature in my cardmaking rotation for the foreseeable future.


I tried a new technique for this card, I heat embossed the Magical Wisteria stamp onto black card, I then used the stencils and applied white pigment ink which I heat set. I then used the stencils again to apply coloured die ink - my top tip for this is to dab on the ink rather than blend, even though the white pigment ink was heat set, it still moves around. I used the Mystic Garden Cardstock pack for the glitter paper, the whole pack pairs so well with this release.


The standalone Wisteria die is so pretty, I used the Mystic Garden Cardstock pack again for this card, using alcohol markers to achieve that deeper purple but it still keeps that lovely metallic shimmer. I also used the Sparkles stencil to emboss the cardstock - it's so fun using stencils to emboss! I wanted to achieve the look of Wisteria blowing in the breeze, so I anchored the stem to a jump ring and attached it to another jump ring hidden behind the frame - take a look at the movement over on Instagram!

Now, on to the giveaway and hop details!

Alex Syberia Designs is giving away a $15 or £15 gift card to three lucky winners.

The giveaway is open internationally. All three winners will be selected from entrants who take part in the blog hop by 11:59 pm BST on October 18. The winners will be announced on the 'Giveaway Winners' page of the Alex Syberia Designs blog on October 19.

Next up is the wonderful Sammi Stamps, but be sure to visit all of the talented creators below!

Alex Syberia Designs

Mona

Rachel

Nicoletta

Lea

Sylvie

Brenda

Martin

Carol

Ang

Samantha

Caly

Lien


Have a wonderful day, thanks for stopping by and good luck!

Thursday, 1 March 2012

Make It Monday - Creating Large Frames...

from smaller stamps is the challenge over on the Papertrey Ink blog this week. I took Tag It's 5 masked off a circle with paper and stamped around the edge to create a scalloped frame for my sentiment.


Supplies used:
Stamps:Tag-It's 5 - Papertrey Ink
Patterned Paper - Doodlebug, My Minds Eye
Felt - Dainty Paperie
Button - Papertrey Ink
Dies - Papertrey Ink
Ink - Papertrey Ink, Memento

I stamped the background using the same stamp set, layered some pretty co-ordinating patterned paper, created the felt embellishment and mounted it all with foam tape to add dimension. I like the 'It's your day' sentiment as it can be used for a number of occasions.

Happy Thursday :)

Tuesday, 1 September 2009

A very productive few days.

I was lucky enough to finish work on Wednesday afternoon for a few glorious days off and decided that I should really get started on making some cards. I have so many birthdays and anniversaries coming up in the next couple of months, usually I only have 1-2 occasions to make for but I have 17 over the next 3 months and I need to make a headstart!

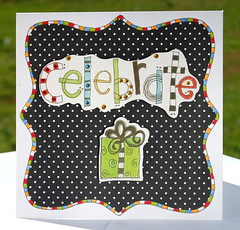
However, sometimes things don't always go to plan. Here is the first, created for my boss for his birthday on Sunday, although I have now found out that he does not celebrate his birthday and is particularly touchy as he is 40 this year so I guess this one is going back in the box ready for another male birthday - I always have trouble striking the right balance on men's cards. I created a template for the background, cut it out of Doodlebug dotted swiss and doodled the coloured frame on the outside to tie it in with the pre-made greeting.

I then became distracted from the task at hand and made a couple of others, not for any particular purpose but just to pull a couple of ideas together.
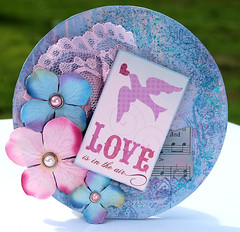
I have been playing around with some vintage-y ideas for a while but I can't seem to strike the right balance, this seems a little bright and the distress stickles didn't go quite how I wanted but when I catch a glance at it on my desk it looks so pretty and girly that I can't resist it! IRL the love card sits behind the flower petals.

This one below isn't floating my boat, sure it would be lovely to blog about the things you are most proud of, but hey, i'll take the rough with the smooth!
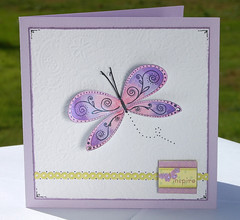
I started off cruising around some blogs looking at stamping techniques so thought I would have a go at stamping and watercolouring. I am resisting the temptation of Copics/Promarkers and I know I couldn't just start off with one of two, I'd want the whole set! I stamped the butterfly with staz-on, so far so good, pencilled with the watercolours and blended them together and I thought it looked ok, then I smothered the whole thing in perfect pearls which looks very spangly but doesn't really show in the picture.

Regardless of the fact that I just spent £30.00 on some new Hero Arts greeting stamps I couldn't find the right sentiment for the card so I used a K&Co sticker, but it had yellow/green on it and there was none on the card so I added the Doodlebug frill. I don't know what it is about me but I like things to tie together, I definitely need to try something outside of my comfort zone!

It's definitely on the 'meh' list so I think i'll just save it for when I need to dash off a quick card! More cards to post this week :)