Goodness me, how did week 5 get here so fast? It seems like just last week that I started the challenge!
Here are this week's prompts:
and here is my take on it:
I love the combination of orange and aqua together. Looking forward to seeing your take on it!
Monday, 31 January 2011
Monday, 24 January 2011
52 Cards Challenge Week 4
How are you this week? Hope that the prompts have been helping to give you a little creative 'push' I know that it has for me. I have managed to make a record number of cards this week, I decided to pull out a paper pad and all the matching embellishments and stickers and went to it, it was very cathartic and on the plus side using it up means I can buy more stash!
Here are the prompts for this week
Have a great week :)
Here are the prompts for this week
Buttons, Pink, Congratulations.
Here is my card
Of course I went with the obvious and made a baby congratulations card, although looking at it now it doesn't have anything that screams baby, it just seems 'babyish' if you know what I mean. I'd love to see what you have come up with, please leave a link to your card in the comments so I can pop on by!Have a great week :)
Wednesday, 19 January 2011
Crafty Templates - Retro Honey
It's Crafty Templates time again and this month I have been working with the delicious Retro Honey kit, featuring all kinds of yummy papers and embellishments, couple this with the cute templates and you have a match made in heaven!
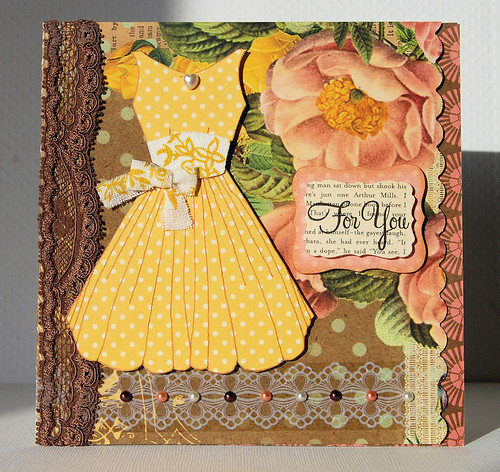
First up is my favourite, featuring the retro dress template and some goregous papers
I simply added a little lace, some of the packaging tape the kit came with and some pearls. So sweet!
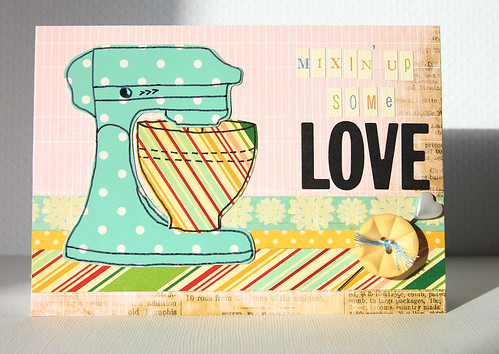
Love this one, I have always wanted a Kitchen Aid mixer and this was so much fun to make!
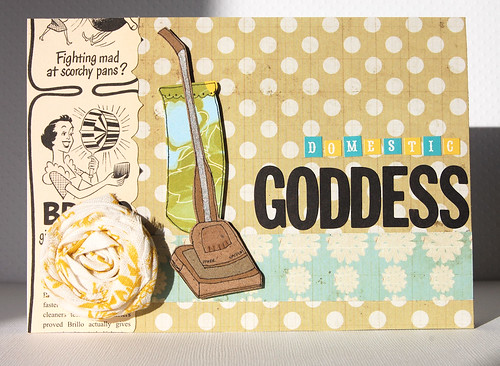
How to use a Hoover template?? It had to be for a domestic goddess! featuring one of the yummy rolled flowers.
Love these darling birds...This card will definitely be going to my honey for Valentines day.
Perfect for Valentines Day or Easter, I see this bunny being used as a tag for the kiddies easter bags.
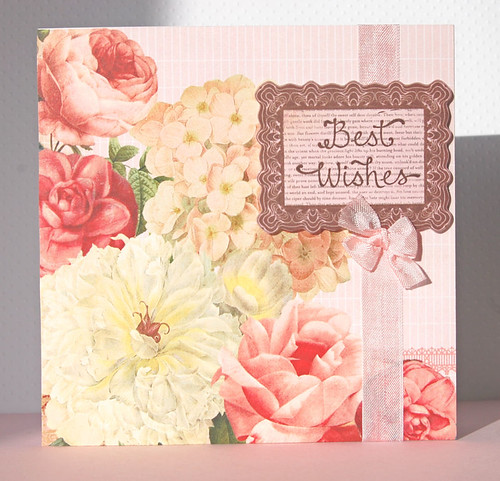
I just loved the paper for this one and could not bring myself to cut it up so I mounted it onto some card, added ribbon and a sentiment and it's finished!
I hope you enjoyed these and if you haven't checked out Crafty Templates, I urge you to do so! Please also pop over to fellow teamie Kathy's blog for her take on this month's templates!
Just as a reminder, the 52 Cards Challenge is up for this week, I hope you will take time to join in :)
First up is my favourite, featuring the retro dress template and some goregous papers
I simply added a little lace, some of the packaging tape the kit came with and some pearls. So sweet!
Love this one, I have always wanted a Kitchen Aid mixer and this was so much fun to make!
How to use a Hoover template?? It had to be for a domestic goddess! featuring one of the yummy rolled flowers.
Love these darling birds...This card will definitely be going to my honey for Valentines day.
Perfect for Valentines Day or Easter, I see this bunny being used as a tag for the kiddies easter bags.
I just loved the paper for this one and could not bring myself to cut it up so I mounted it onto some card, added ribbon and a sentiment and it's finished!
I hope you enjoyed these and if you haven't checked out Crafty Templates, I urge you to do so! Please also pop over to fellow teamie Kathy's blog for her take on this month's templates!
Just as a reminder, the 52 Cards Challenge is up for this week, I hope you will take time to join in :)
Monday, 17 January 2011
52 Cards Challenge Week 3
Hello, thank you for those that entered last week, there were some beautiful cards made!
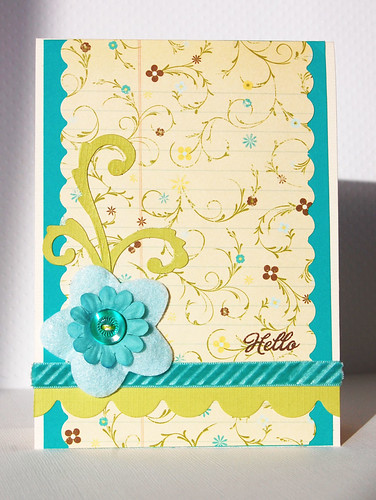
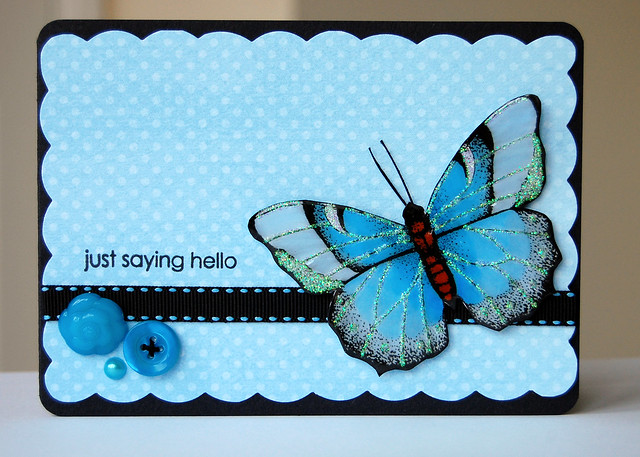
Here are the prompts for this week: Blue, Flourishes, Hello
I had fun making this card as I got to use some of my lovely Making Memories Noteworthy papers!
Remember you can use just one of the prompts or all three and it's up to you how you interpret them :)
Look forward to seeing you next week and I hope this is helping you create some stunning cards!
Here are the prompts for this week: Blue, Flourishes, Hello
I had fun making this card as I got to use some of my lovely Making Memories Noteworthy papers!
Remember you can use just one of the prompts or all three and it's up to you how you interpret them :)
Look forward to seeing you next week and I hope this is helping you create some stunning cards!
Monday, 10 January 2011
52 Cards Challenge Week 2
Wow, I am so pleased that so many people intend to take part in the 52 Card Challenge. If you aren't sure what it is please take a look at the post below for full details, however to recap the challenge is to create a card using the 3 prompts given.
You can choose to use just one of the prompts or all three it's completely up to you! I have developed a very hi-tech and complex system for picking the prompts. I take 3 paper bags, each filled with prompts that cover a colour, a technique and a theme/style and pick one from each bag - tee hee, i told you it was technical!
Without further ado, here are the prompts for week 2
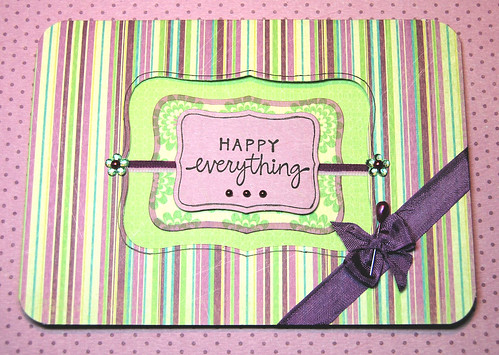
You can choose to create a card that features purple, or one that has die cuts or one with stripes, you can choose to have a combination of two, or, you can be like me and use all 3! Remember, it is completely up to you how you interpret the prompts, they are there to be a little kick start to the whole creative process :)
It was nice to be able to dig into some newish stash of MME Penny Lane, I also used my beloved Nesties and a cute stamp I picked up in the US whilst on holiday last year. For some reason the ribbon looks very dark in the photo, it's much more the colour of the lighter purple in the stripes.
Please feel free to add your link below, or within the comments section or in the challenge thread on UKS
I look forward to seeing all your creations!
You can choose to use just one of the prompts or all three it's completely up to you! I have developed a very hi-tech and complex system for picking the prompts. I take 3 paper bags, each filled with prompts that cover a colour, a technique and a theme/style and pick one from each bag - tee hee, i told you it was technical!
Without further ado, here are the prompts for week 2
You can choose to create a card that features purple, or one that has die cuts or one with stripes, you can choose to have a combination of two, or, you can be like me and use all 3! Remember, it is completely up to you how you interpret the prompts, they are there to be a little kick start to the whole creative process :)
It was nice to be able to dig into some newish stash of MME Penny Lane, I also used my beloved Nesties and a cute stamp I picked up in the US whilst on holiday last year. For some reason the ribbon looks very dark in the photo, it's much more the colour of the lighter purple in the stripes.
Please feel free to add your link below, or within the comments section or in the challenge thread on UKS
I look forward to seeing all your creations!
Thursday, 6 January 2011
Happy New Year and a new 2011 card challenge!
Happy New Year to all my lovely readers I hope 2011 finds you happy and healthy! I have decided to make 2 new years resolutions:
1. Create more.
2. Update my blog more often.
and I have found a way to do both.
Introducing Paper and Ribbons 52 Cards Challenge.
I am in awe of those crafters that can make a card a day, unfortunately I can't keep up and one a month is too few, so every week I will set myself a challenge to create a card a week based on three simple prompts. It could vary from:
Cosmo Cricket/Ribbon/Male Card
Stamping/Die Cuts/Buttons
See? pretty simple! and to upload the picture to my blog. This week's challenge started on Monday uses the following prompt:
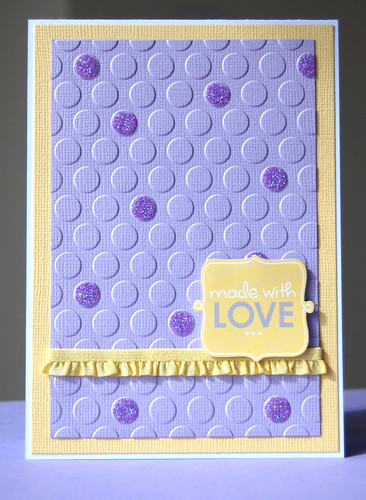
Embossing/Lilac/Yellow
I'd love it if any of you wanted to join in and posted links to your cards (tags or other projects using the challenge theme) in the comments, if enough people join I'll add Mr Linky to make it easier.
I am also nearing my 100th post so hope to offer up some blog candy or a prize at random to someone who has entered the challenge!
Here is my card for this week
I hope to see you next week :)
1. Create more.
2. Update my blog more often.
and I have found a way to do both.
Introducing Paper and Ribbons 52 Cards Challenge.
I am in awe of those crafters that can make a card a day, unfortunately I can't keep up and one a month is too few, so every week I will set myself a challenge to create a card a week based on three simple prompts. It could vary from:
Cosmo Cricket/Ribbon/Male Card
Stamping/Die Cuts/Buttons
See? pretty simple! and to upload the picture to my blog. This week's challenge started on Monday uses the following prompt:
Embossing/Lilac/Yellow
I'd love it if any of you wanted to join in and posted links to your cards (tags or other projects using the challenge theme) in the comments, if enough people join I'll add Mr Linky to make it easier.
I am also nearing my 100th post so hope to offer up some blog candy or a prize at random to someone who has entered the challenge!
Here is my card for this week
I hope to see you next week :)
Sunday, 19 December 2010
Gift Box Tutorial - Last Minute Make
A little while ago I was flicking back through some old magazines and came across some instructions for a simple gift box using 2 sheets of 12x12 paper. I was thrilled that it actually worked and it has really come in handy on the run up to christmas for boxing up home-made candy and cookies, even small christmas presents. Even though this might be old to you it's new to me!
Gift Box Tutorial

Gift Box Tutorial
Start with a sheet of 12x12 paper
Fold it in half, patterned paper to patterned paper then fold in half again. Open the paper back out and turn over patterned side down.
Fold the paper as shown to form a square.
Fold the paper to meet the middle
and repeat with the other side
Turn the paper 180 degrees and fold the paper into the centre
open the paper out as shown
open out one end of the paper
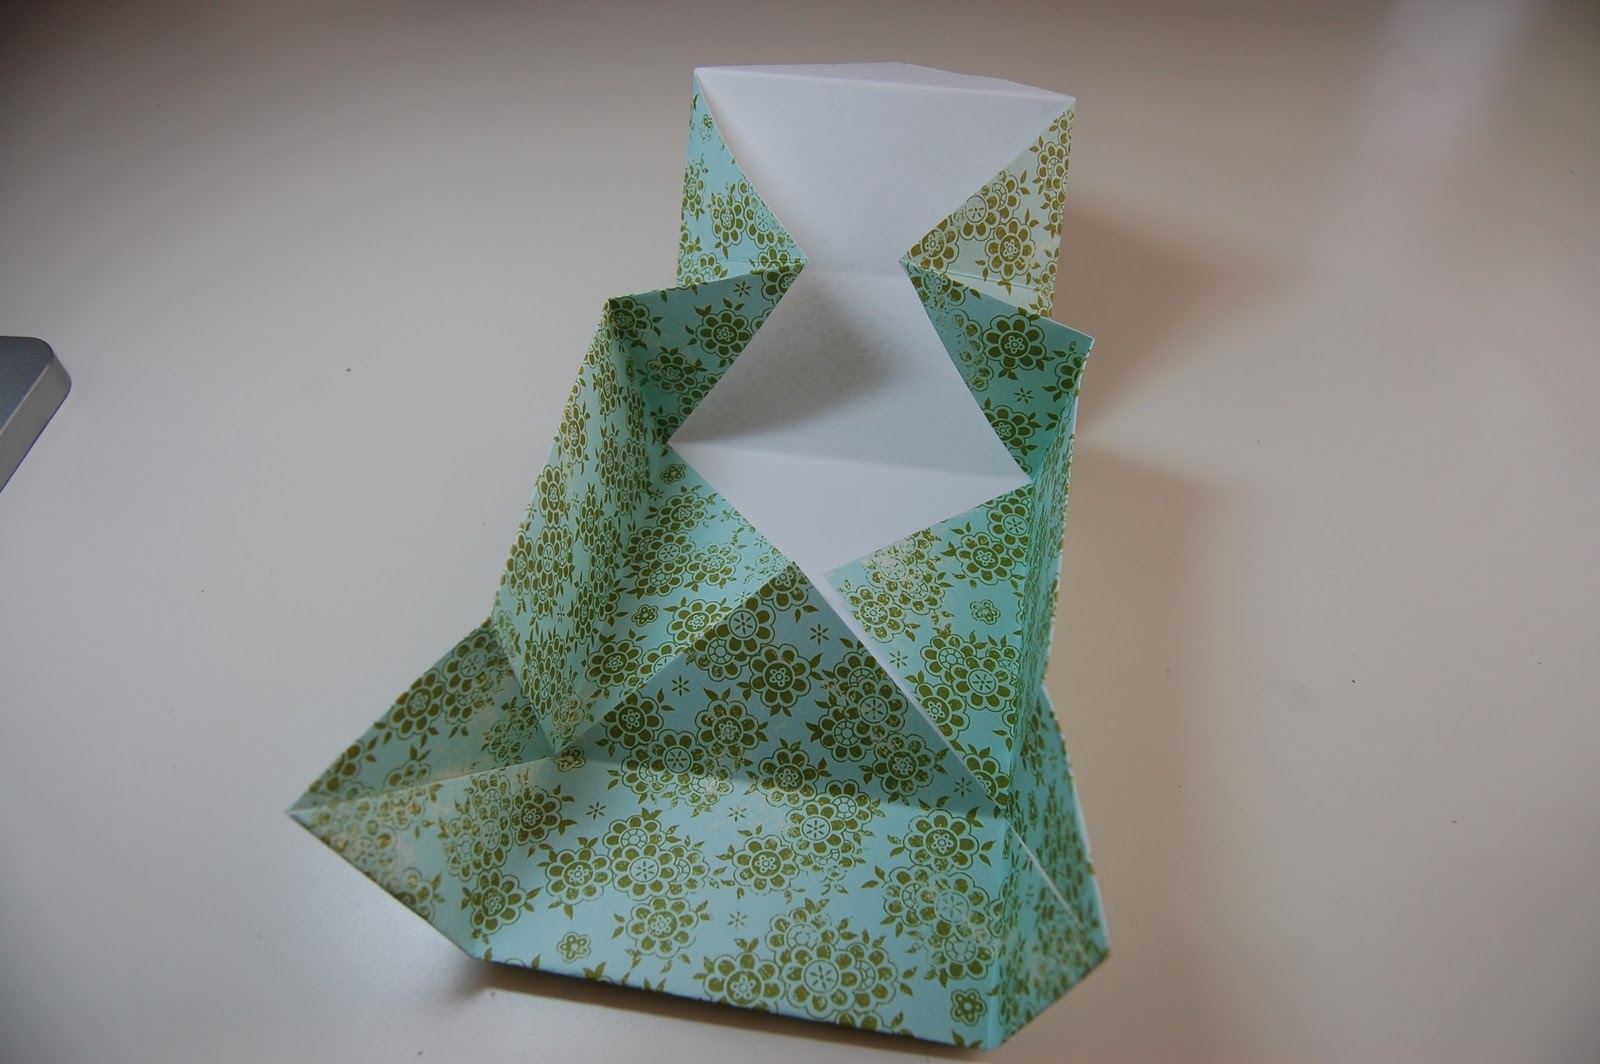
fold the paper inwards as shown at one end. This was the hardest part for me but once you figure out the fold you'll be whipping lots of these up in no time!
fold the paper over to create the side and part of the base
repeat with the other end, this will be the box lid. To create the box base repeat all of the above steps but start with an 11.5x11.5 sheet of paper
The finished article!
It's so easy to make smaller boxes to fit little gifts. The boxes here are made using 12x12, 8x8 and 6x6. I set an eyelet in the lid of the 6x6 box, threaded ribbon through and hung on my christmas tree!
I hope this is useful to anyone that has not seen this technique before!
Monday, 15 November 2010
A Time To Remember - Daring Cardmakers
Here is my card for the Daring Cardmakers Time to Remember card challenge in honour of the service men and women who have given their lives for our freedom. May we always remember them and the sacrifices they made.
Christmas Gift Ideas - Part 1
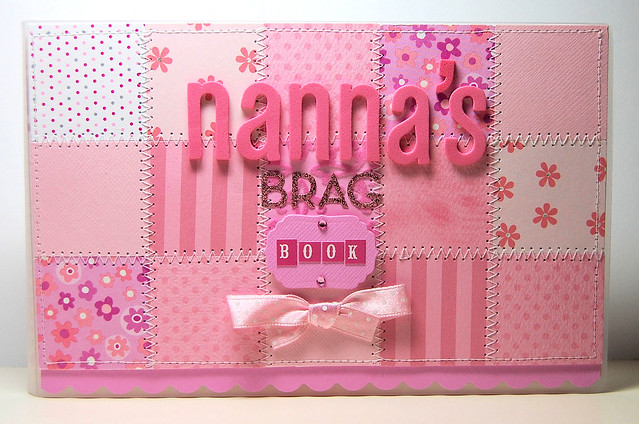
I'm hoping to post a small series of ideas on quick and easy christmas gifts. My first idea is creating small 'Brag Books' easy enough for any proud parent, grandparent or auntie to carry around in their handbag.
Supplies needed:
Wood ware Blue 2" Craft Punch
Paperchase Clear 4x6 slip in Photo Album
Paper Scraps
Letter stickers
Ribbon
1. Punch 15 squares from co-ordinating paper, this is a great way to use up some of those scraps.
2. Mount the 15 squares on a sheet of card, use a small dab of pritt stick to attach so the glue does not gunk up the needle when sewing.
3. Sew a running stitch around the edge, pull the end of the thread through and tie underneath.
4. Using a zigzag stitch sew across the edges of the squares to create the patchwork effect, pull the end of the thread through the last hole and tie underneath.
4. Trim off the excess card and adhere to the front of the album.
5. Decorate the front with letter stickers, ribbon and any embellishments that you like
Finished! This little project takes about 30 mins, and is simple even for those challenged by a sewing machine (I count myself as one of those people!) I have taken the additional step of placing some paper on the inside cover and adding a MME Daily Dose journalling card;
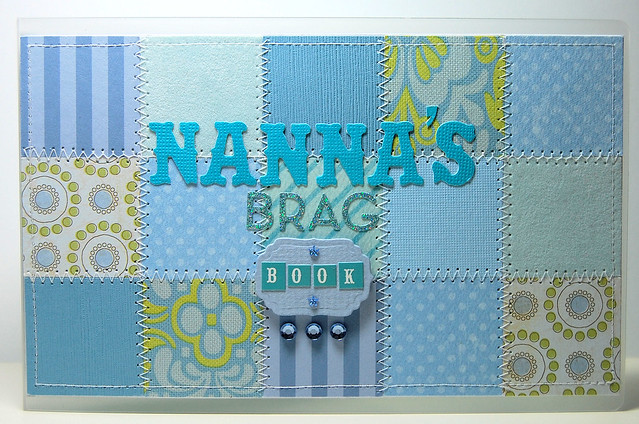
so the proud receipient can have all the important details close to hand! Here is one I have made in blue.
Apart from the cost of the album (£1.50) you should have most of the products on hand, so this is a nice, cheap but reasonably expensive looking gift! If you make one I would love to see it!
Back soon x
Supplies needed:
Wood ware Blue 2" Craft Punch
Paperchase Clear 4x6 slip in Photo Album
Paper Scraps
Letter stickers
Ribbon
1. Punch 15 squares from co-ordinating paper, this is a great way to use up some of those scraps.
2. Mount the 15 squares on a sheet of card, use a small dab of pritt stick to attach so the glue does not gunk up the needle when sewing.
3. Sew a running stitch around the edge, pull the end of the thread through and tie underneath.
4. Using a zigzag stitch sew across the edges of the squares to create the patchwork effect, pull the end of the thread through the last hole and tie underneath.
4. Trim off the excess card and adhere to the front of the album.
5. Decorate the front with letter stickers, ribbon and any embellishments that you like
Finished! This little project takes about 30 mins, and is simple even for those challenged by a sewing machine (I count myself as one of those people!) I have taken the additional step of placing some paper on the inside cover and adding a MME Daily Dose journalling card;
so the proud receipient can have all the important details close to hand! Here is one I have made in blue.
Apart from the cost of the album (£1.50) you should have most of the products on hand, so this is a nice, cheap but reasonably expensive looking gift! If you make one I would love to see it!
Back soon x
Sunday, 14 November 2010
Birthday Sprinkles!
After a little holiday break I am back again with November's Crafty Templates card kit 'Sprinkles', filled with sugar sweet papers and cardstock, tickets, tags and some scrumptious ribbon. I used the fun stacked cakes template for the first card
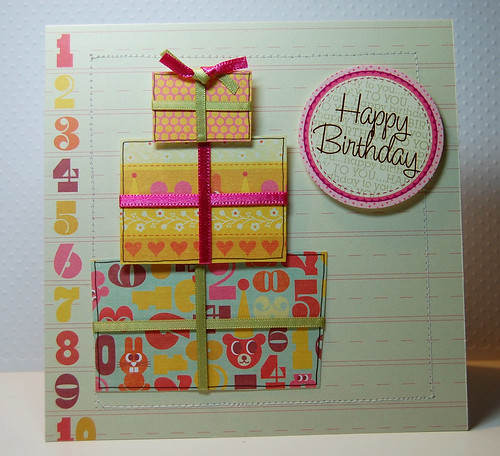
The cakes look so adorable at a jaunty angle, I think this is one of my favourite templates! The second card features the stack of gifts template and can be used for so many different occasions, change up the papers and you have got a great card for those difficult men's cards :)
I know I sound like a stuck record but I really cannot say enough good things about Leo's kits. The Quirky kits are perfect for scrapbooking and have such cute little touches, the Card Making kits are a joy to work with and the Crafty Bales kits sell like hotcakes, so much so that I missed out on getting one they sell so fast, they are filled with paper crafting goodies and can contain components for mini books, fabric and much more.
Take a look at fellow DT Kathy's blog to see what she has done with this month's kit!
Hope to be back later in the week with a little gift box tutorial (it's new to me but may be old to you but they will be great for xmas!)
The cakes look so adorable at a jaunty angle, I think this is one of my favourite templates! The second card features the stack of gifts template and can be used for so many different occasions, change up the papers and you have got a great card for those difficult men's cards :)
I know I sound like a stuck record but I really cannot say enough good things about Leo's kits. The Quirky kits are perfect for scrapbooking and have such cute little touches, the Card Making kits are a joy to work with and the Crafty Bales kits sell like hotcakes, so much so that I missed out on getting one they sell so fast, they are filled with paper crafting goodies and can contain components for mini books, fabric and much more.
Take a look at fellow DT Kathy's blog to see what she has done with this month's kit!
Hope to be back later in the week with a little gift box tutorial (it's new to me but may be old to you but they will be great for xmas!)
Saturday, 13 November 2010
Bits and Pieces
I'm busy beavering away making christmas gifts and various other bits and pieces. Using an idea I saw in an issue of CK I decided to create a chart for my distress inks so I can see at a glance what colours I have because looking at the ink pad itself isn't a good indicator!
It's pretty and functional!
I was fortunate enough that Mr Paper agreed to take me to the NEC last week. I was a little disappointed as it wasn't as large as I thought it would be and it was definately more crowded so I didn't come home with as many bits and pieces as I would like but I made up for it by ordering a few things on line. This is what I came away with..
Some bargain basic grey pads and embellishments from here.
Some cute fabric cones from Ikea and little christmas wood shapes from Tesco which are destined to be used as card toppers or on scrapbook pages.
And I finally succumbed and bought the Tattered Florals die!
At the NEC I declared to Mr Paper that I was going to make my own christmas cards. He reminded me that the last time I did this I said to him to tell me that I was not to do it again and I was crazy if I considered it. 'Ha' was my response, 'it will be better this time, this time I have a plan' to which he rolled his eyes and said 'just don't expect any sympathy when you get frustrated with it', I was confident that this time would be different.
Take some silver glitter paper, one reindeer die and....
Argh, WTH was I thinking, this is how many reindeers I managed before I wanted to sit rocking in a corner quietly weeping. Mr Paper was sympathetic and compromised that I would make snazzy christmas cards for the family and I would buy a box of generic cards to send to everyone else, thank goodness!
If I say next year that I will make my own cards, tie my hands together, lock my craft room and remind me to re-read this post. I am in awe of you if you make all your own christmas cards!
It's pretty and functional!
I was fortunate enough that Mr Paper agreed to take me to the NEC last week. I was a little disappointed as it wasn't as large as I thought it would be and it was definately more crowded so I didn't come home with as many bits and pieces as I would like but I made up for it by ordering a few things on line. This is what I came away with..
I was pleased to add some more distress inks to my collection and grabbed some lovely little 4x4 cards for my christmas cards along with the reindeer flight die, but more on that later. These are the other goodies I bought on line..
I have been itching to get some of these for ages and was pleased to find them for £2.50 a pack from here.Some bargain basic grey pads and embellishments from here.
Some cute fabric cones from Ikea and little christmas wood shapes from Tesco which are destined to be used as card toppers or on scrapbook pages.
And I finally succumbed and bought the Tattered Florals die!
At the NEC I declared to Mr Paper that I was going to make my own christmas cards. He reminded me that the last time I did this I said to him to tell me that I was not to do it again and I was crazy if I considered it. 'Ha' was my response, 'it will be better this time, this time I have a plan' to which he rolled his eyes and said 'just don't expect any sympathy when you get frustrated with it', I was confident that this time would be different.
Take some silver glitter paper, one reindeer die and....
Argh, WTH was I thinking, this is how many reindeers I managed before I wanted to sit rocking in a corner quietly weeping. Mr Paper was sympathetic and compromised that I would make snazzy christmas cards for the family and I would buy a box of generic cards to send to everyone else, thank goodness!
If I say next year that I will make my own cards, tie my hands together, lock my craft room and remind me to re-read this post. I am in awe of you if you make all your own christmas cards!
Friday, 5 November 2010
Just a quickie
I know I have been a little quite recently, scrapbooking seems to have sucked up a lot of my time! I have a new Crafty Templates kit to work with this week so I hope to be back to a more regular posting schedule shortly!
Monday, 20 September 2010
Crafty Templates Circus
Roll up, roll up, the circus is in town! I have had lots of fun working with the September Crafty Templates Card Making Kit and Templates called Circus. As I have said previously Leo has such a great eye when it comes to putting kits together and this month's certainly did not disappoint. Filled with lots of My Minds Eye yumminess with some Cosmo Cricket thrown in for good measure.
The templates are fab for children's birthday cards or for making your own miniature toppers to have handy for decorating cards or embellishing your scrapbook page. If you haven't tried one of Leo's kits, I urge you to do so, they are such great value and filled with quality supplies and ideas!
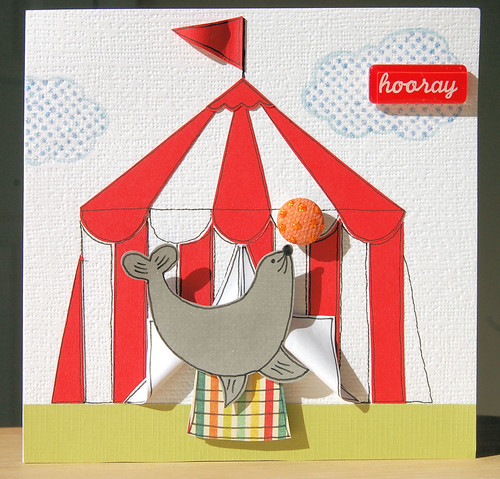
Here is my personal favourite, the sea lion!
I used the sealion coupled with the big top template, it was so much fun to put together. I added some American Crafts stamped clouds and an acrylic sentiment tile.
Here he is juggling some brad 'balls'. I love, love, love the Cosmo Cricket tiny type alphas!
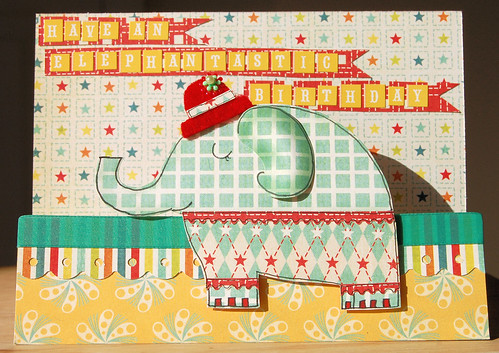
Mrs Nellie Phant is just adorable in her little felt hat set at a jaunty angle! Finally there is Mr Robot
I added the tag, Cosmo Cricket cogs rub ons and some Heidi Swapp chipboard lettering, perfect for that special little boy's birthday.
I don't know where the time keeps going, yet another busy couple of weeks where I have done much less crafting than I would like. I am going off to the land of the mouse this week and hope to pick up lots of crafty goodies and come back feeling all inspired.
Have a great couple of weeks and see you when I get back!
The templates are fab for children's birthday cards or for making your own miniature toppers to have handy for decorating cards or embellishing your scrapbook page. If you haven't tried one of Leo's kits, I urge you to do so, they are such great value and filled with quality supplies and ideas!
Here is my personal favourite, the sea lion!
I used the sealion coupled with the big top template, it was so much fun to put together. I added some American Crafts stamped clouds and an acrylic sentiment tile.
Here he is juggling some brad 'balls'. I love, love, love the Cosmo Cricket tiny type alphas!
Mrs Nellie Phant is just adorable in her little felt hat set at a jaunty angle! Finally there is Mr Robot
I added the tag, Cosmo Cricket cogs rub ons and some Heidi Swapp chipboard lettering, perfect for that special little boy's birthday.
I don't know where the time keeps going, yet another busy couple of weeks where I have done much less crafting than I would like. I am going off to the land of the mouse this week and hope to pick up lots of crafty goodies and come back feeling all inspired.
Have a great couple of weeks and see you when I get back!
Saturday, 11 September 2010
Two cards for two Mama's
I have so many birthdays in September, 6 at the last count! My beautiful mama's is on the 6th and Mr Paper's Mama is on the 18th so I was tasked with making two very special cards.
I tend to keep lapsing back into the same style, shabby chic but with a cleaner edge, I love it so much and I think they look so pretty that I can't help myself, it's like falling into a comfortable armchair. I need to start making things outside my comfort zone otherwise I will get stuck in a rut and that's not good!
Here is the card I made for my mum
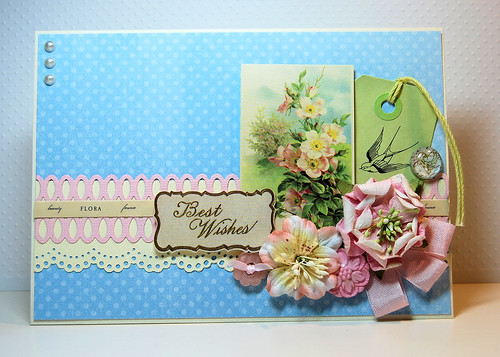
I had to walk away from it because I just kept adding more embellishments and I think I nearly 'over egged the pudding' Supplies used: Paper; Making Memories, Flowers; Making Memories, Prima, Imaginisce, Lace; Crafty Templates, Frame; Melissa Frances, Letters; American Crafts.
This is card number two
Supplies used: Paper; MME, Sticker; Stampendous, Flowers; Prima, Lace; Crafty Templates, Badge and Letters; American Crafts.
I love them both although the blue one just edges it for me, I love flocked paper, especially when it is damask!
Happy days :)
I tend to keep lapsing back into the same style, shabby chic but with a cleaner edge, I love it so much and I think they look so pretty that I can't help myself, it's like falling into a comfortable armchair. I need to start making things outside my comfort zone otherwise I will get stuck in a rut and that's not good!
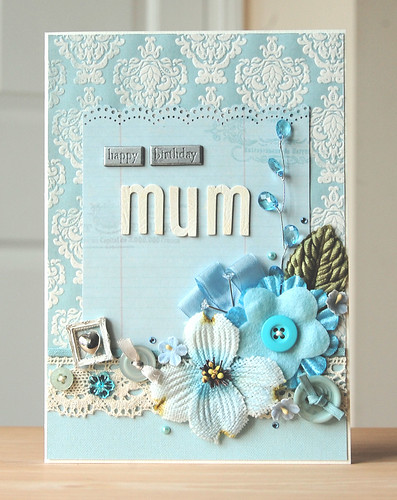
Here is the card I made for my mum
I had to walk away from it because I just kept adding more embellishments and I think I nearly 'over egged the pudding' Supplies used: Paper; Making Memories, Flowers; Making Memories, Prima, Imaginisce, Lace; Crafty Templates, Frame; Melissa Frances, Letters; American Crafts.
This is card number two
Supplies used: Paper; MME, Sticker; Stampendous, Flowers; Prima, Lace; Crafty Templates, Badge and Letters; American Crafts.
I love them both although the blue one just edges it for me, I love flocked paper, especially when it is damask!
Happy days :)
Friday, 10 September 2010
Better late than never!
Ever feel like there are not enough hours in the day? Yup, same here, I've got quite a few cards that I have made that I haven't got around to sharing so I'll be posting a few over the next couple of weeks :)
Here are last month's Crafty Templates using the 'Chilled Out' card kit which includes a summery mix of yummy Sassafrass Lass papers. Go here to get yours before they sell out!
This is my favourite, I adore Mary Janes and it makes it even cuter that my husband thought of the sentiment!
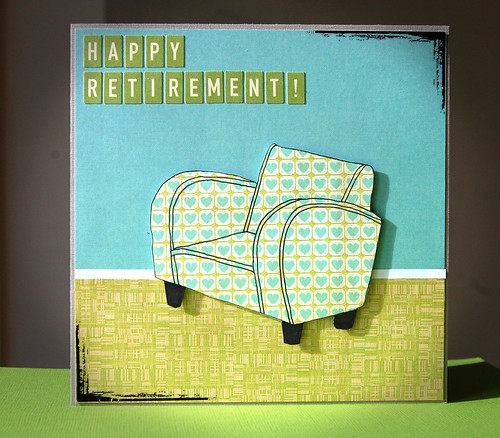
I like the simplicity of this one, sit back, relax and enjoy your retirement. Oh how I'd love to be retired, sitting crafting all day, bliss!
Well, that's it for now, be back later with some more x
Here are last month's Crafty Templates using the 'Chilled Out' card kit which includes a summery mix of yummy Sassafrass Lass papers. Go here to get yours before they sell out!
This is my favourite, I adore Mary Janes and it makes it even cuter that my husband thought of the sentiment!
I like the simplicity of this one, sit back, relax and enjoy your retirement. Oh how I'd love to be retired, sitting crafting all day, bliss!
Well, that's it for now, be back later with some more x
Wednesday, 28 July 2010
WOYWW - 28/07/2010
Hello WOYWW-ers, hope you are all doing ok, I've missed the past couple of weeks as things have been a bit hectic! No workdesk today as I forgot to take a picture (what a doofus!) instead I have a picture of my home made clip it up.
I had been bugging Mr Paper for a couple of years about buying me a clip it up and the silly, silly man, instead of parting with the cash said "why buy when I can make you one", of course I bugged him for weeks and weeks to make it and it never materialised, eventually I was resigned to the fact that I would never get one and would have to continue raking through a large cardboard box to find my supplies.
One day, many months later, he came home from work and placed a large object wrapped in a bin bag on the table with a heavy 'thunk', imagine my delight when I saw what he had made! I am lucky that he works in a manufacturing plant where he has access to lots of tools, metal, paint and such like. The only change I made was to spray it white. I bought lots of clips and hooks from Ikea and now have my very own rotating, albeit and bit heavy, clip it up!
So, here is the card I made today on the workdesk I forgot to photograph!
I had been bugging Mr Paper for a couple of years about buying me a clip it up and the silly, silly man, instead of parting with the cash said "why buy when I can make you one", of course I bugged him for weeks and weeks to make it and it never materialised, eventually I was resigned to the fact that I would never get one and would have to continue raking through a large cardboard box to find my supplies.
One day, many months later, he came home from work and placed a large object wrapped in a bin bag on the table with a heavy 'thunk', imagine my delight when I saw what he had made! I am lucky that he works in a manufacturing plant where he has access to lots of tools, metal, paint and such like. The only change I made was to spray it white. I bought lots of clips and hooks from Ikea and now have my very own rotating, albeit and bit heavy, clip it up!
So, here is the card I made today on the workdesk I forgot to photograph!
If you haven't seen it yet, have a little look at the post below which has a tutorial on how to make a rolled spiral flower wreath.
Have a great week!
Subscribe to:
Posts (Atom)